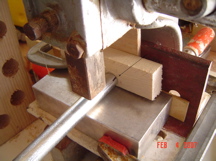
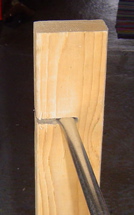
Positioning the strut to be pressed This strut is in the correct position to be pressed. Click the picture for a better view. Notice that the mark which identifies the location of the seam is at 45 degrees to horizontal. In fact, any 45 degree location is fine. In otherwords, if the end of the pipe was a clock, it could be at 1:30, 4:30, 7:30 or 10:30. If you put the mark at 3:00, 6:00, 9:00 or 12:00 the pipe will split. |
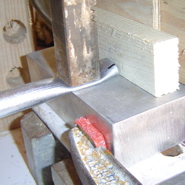
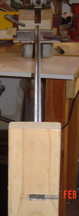
The correct depth This view of the strut shows that the press exactly meets the front of the aluminum base block. And, you can see that the amount of strut that can be crushed is limited by a block of wood. This makes sure that your struts are all uniform -- have the same amount of flattened metal at each end of each strut. For 1/2" conduit my depth was 1.625". For 3/4" conduit my depth was 2.125". |
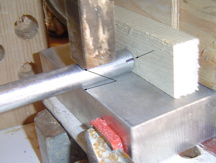
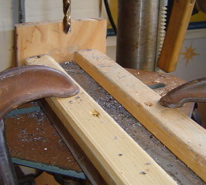
The First Press The first press must be made here, and not at the very end (where the mark is. Trust me. If you don't, you won't be able to easily press at this position, because the pipe will have a "slope" leading down to the pressed end and it may slide around. All these photos are from making struts from 1/2" EMT. When you do it with 3/4" EMT the press may not be wide enough to crush both edges. So, you'll need to raise the press a bit, slide it over and crush one edge, and repeat for the other edge. |
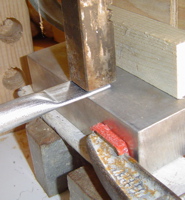
Press the Rest Press whatever remains, until the entire tab is flat. For 3/4" EMT you may have to press each edge as well as the center. |
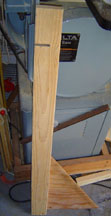
Coplaner Jig You'll need a coplaner jig. This is made from a length of 2x4 and a scrap piece of plywood (or anything that works to keep it vertical. You'll cut a slot in the plywood, being careful that the slot is perpendicular to the edge of the 2x4. My coplaner jig uses a triangle of plywood at the base to guarantee that the 2x4 is exactly vertical (despite the perspective of the photograph). The height of the coplaner jig depends entirely on the height of your press. The pipe should be horizontal to the ground so that when you press the second end of the strut, it doesn't lift the jig off the ground, nor does it result in a bent end of the pipe because the jig was too high. The jig must be the right hight so that the end of the strut to be pressed is in full contact with the bottom block of the press, with no gaps at the near or far end of the section to be pressed. |
Using the Coplaner Jig You need this jig because you need the two flat ends of each strut to be in the same plane (coplaner). You use it to guarantee that the second pressed end is in the same plane as the first one. So, after you have pressed one end, you insert the pressed end into the slot in the jig. Move the jig far enough away from the press so that the other end of the strut (which you are about to press) is in the right position. You may need to move the jig to one side or another to ensure that the strut enters the press straight-on and not at an angle. |
Conduit Drilling Jig You will also need a conduit drilling jig. This is made from a 4' length of 2x4 with two 4' lengths of 1x2 screwed to it. The space between the 1x2s must be sufficient for the conduit to lay flat, but you want the flattened end of the strut to rest on both of the 1x2s, My conduit drilling jig was made for 3/4" conduit, so you'll see in the next pictures how I modified it to work with 1/2" conduit by adding some shims. The bottom line is that you need a way to hold the conduit securely while you drill a hole in exactly the right position. |
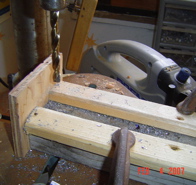
Mounting the Conduit Drilling Jig I use a drill press, which is ideal for drilling conduit. If you only have an electric drill, you should use a center punch to make a dent right where you want your hole to go. You may want to make some sort of jig to make it easier to make that dent in the same place for every strut. I attached my conduit drilling jig to my drill press with large C-clamps. I supported the far end of the jig with a scrap of wood, which I screwed to the jig so it wouldn't fall loose. |