Reusing Post Bases
Why go to the trouble of removing the old wooden post and reusing the concrete post base instead of digging or pulling the old post base out and making a new one?
There are several reasons it makes sense:
- It costs less
- It is less difficult work
- It reduces the demand for concrete, which has a phenomenally large environmental cost, is heavy and hard to transport and work with, and generally requires prompt cleanup
- You do not have a big chunk of concrete to move and probably dispose of
- You do not end up with a larger post base than you started with (because the hole gets bigger when you remove the post base, meaning you need even more concrete than if it was a new post base).
Of course, nothing is perfect. Sometimes it isn’t possible to reuse a post base because:
- The post base may have “rolled” if the yards are at different heights, resulting in posts that aren’t vertical in one or two directions with respect to the fence line.
- The post base might be cracked
- The concrete might be too thin
- The concrete may have deteriorated if mixed incorrectly
- The post may have been set onto the dirt on the bottom of the original hole, and then concrete was poured in, resulting in a tall donut of concrete, with the bottom of the post remaining on contact with the ground, leading to bottom-up rotting of the post
- There may be no post base at all
If the post isn’t vertical I attach additional wood to it so there is a vertical face or edge on which to build a fence. But, sometimes the post base can’t be reused. If so I try to keep the hole from getting any larger as I remove it. I use a demolition hammer to destroy the post base toward the void in the middle.
How to Reuse a Post Base
Post Replacement reusing the post base is accomplished in these steps:
- Remove the old post from the fence
- Dig out the old post from the post base
- Drive a new post into the post base
- Attach the fence to the new post
All photos by Greg Sandoval, used with permission.
Click any photo to see a larger version.
Remove the old Post
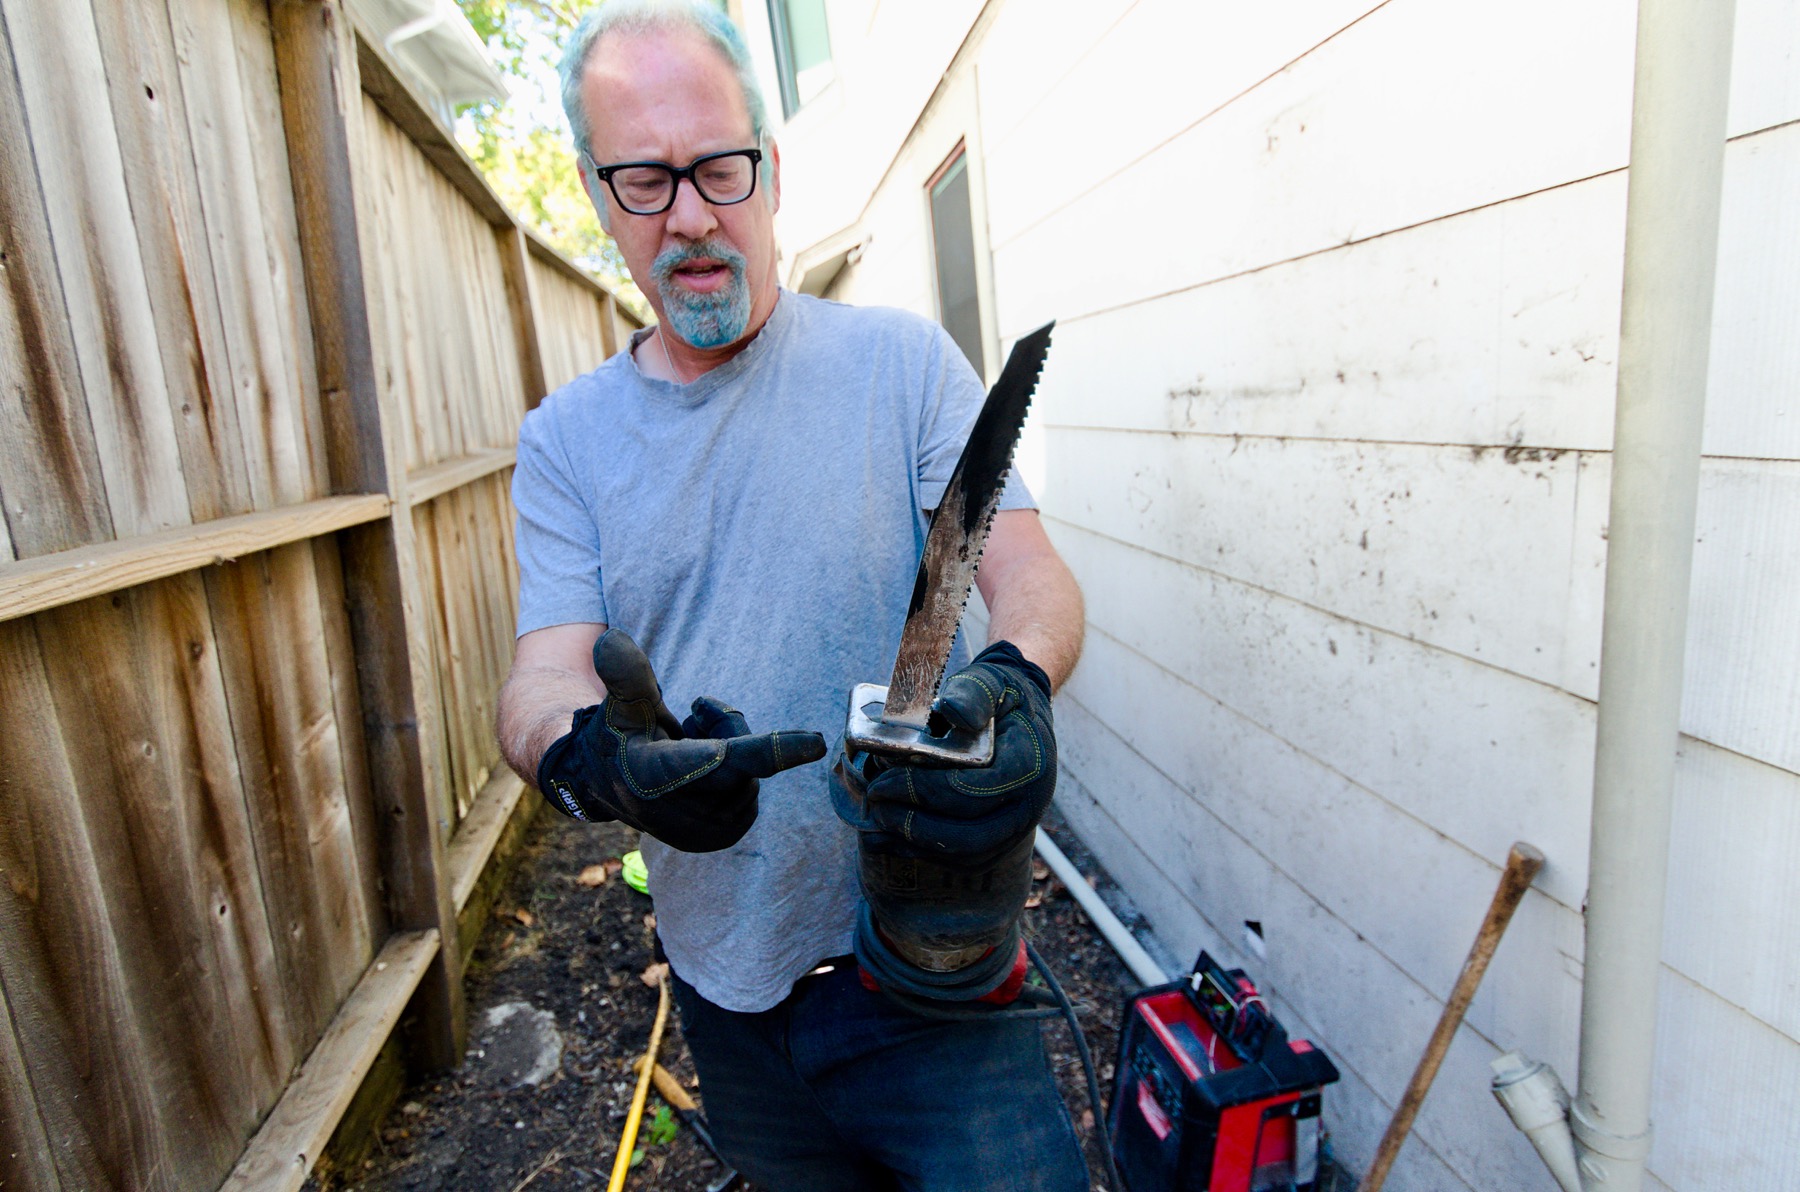
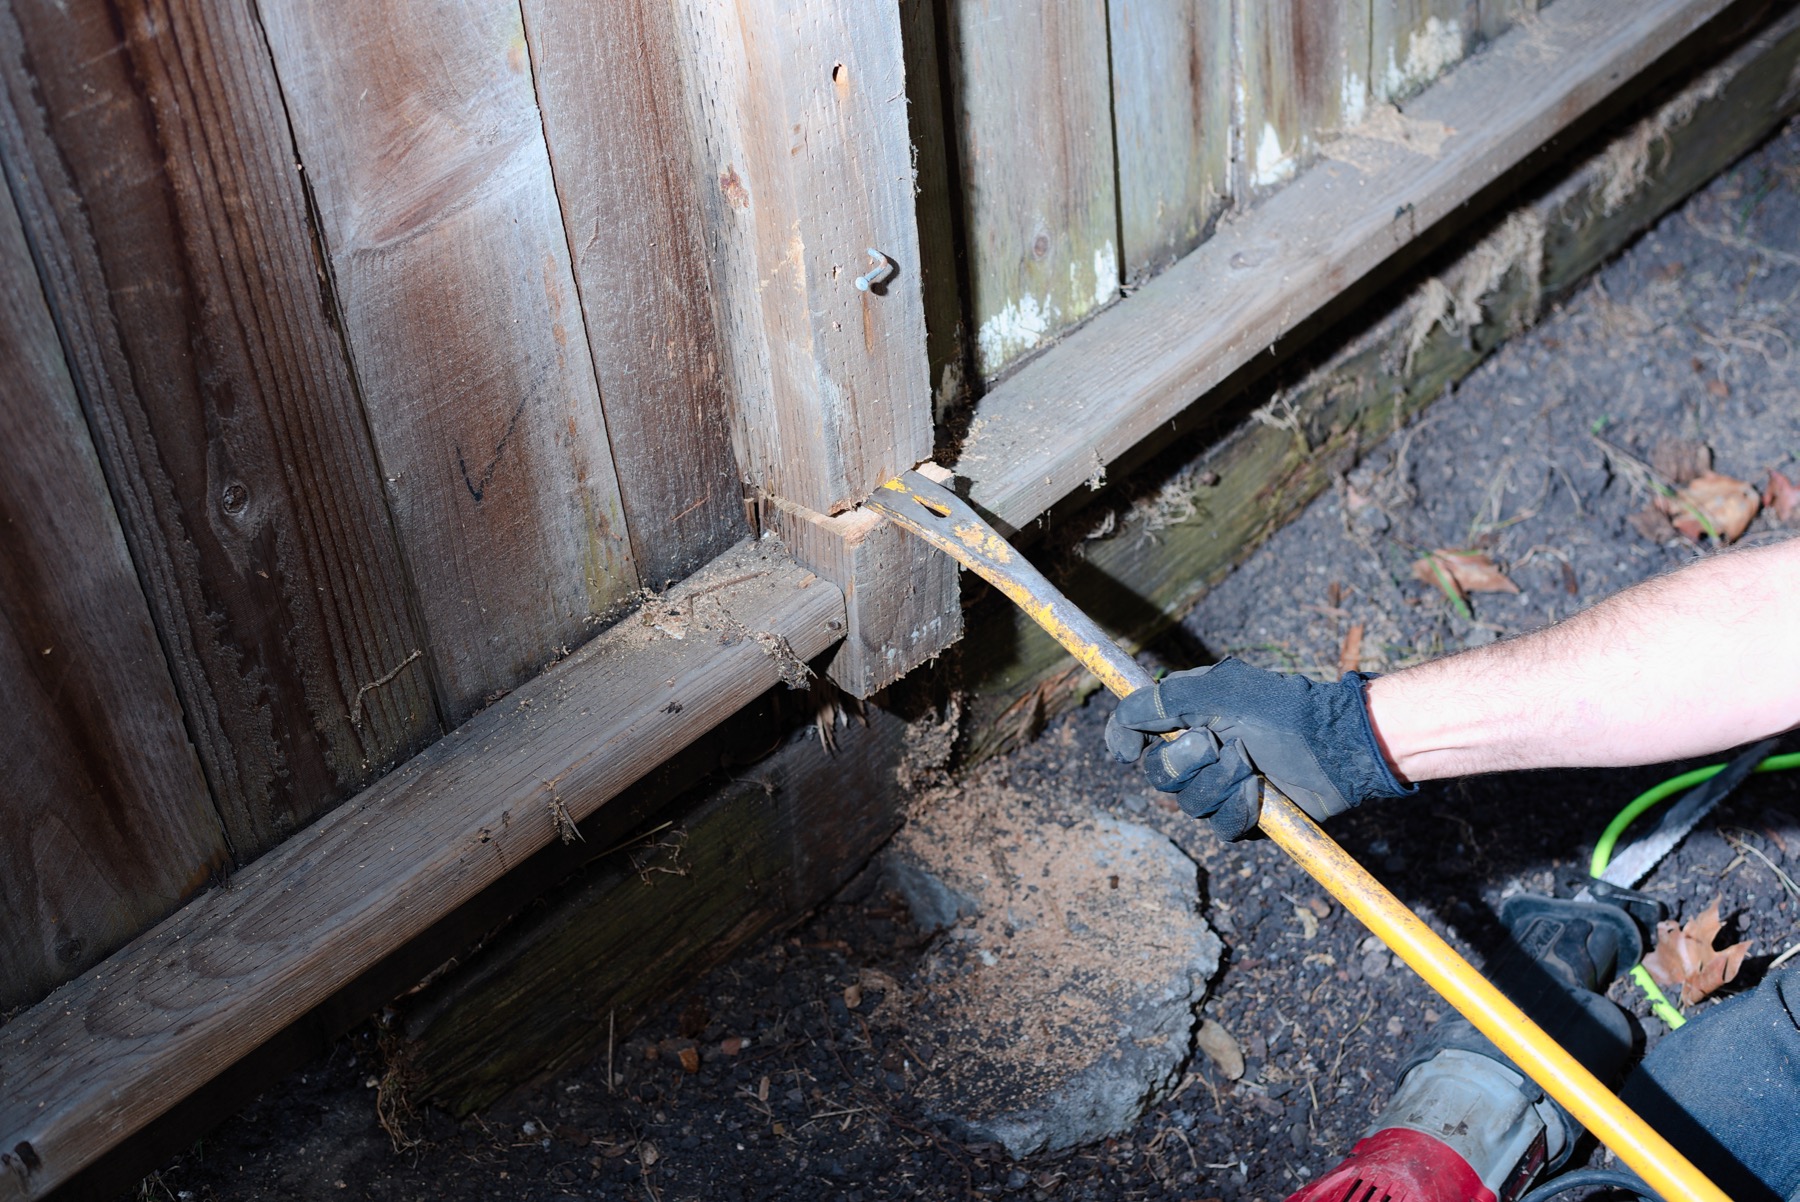
I used only a sawzall, a crowbar, a small and large sledge hammer and a claw hammer to replace the post in this example. Of course I have some better tools, including a demolition hammer, a hammer drill, a 60” pinch bar (aka a digging bar), and a few other smaller crowbars and chisels. But, usually the post is rotted and it is just a matter of digging it out. (Back to top)
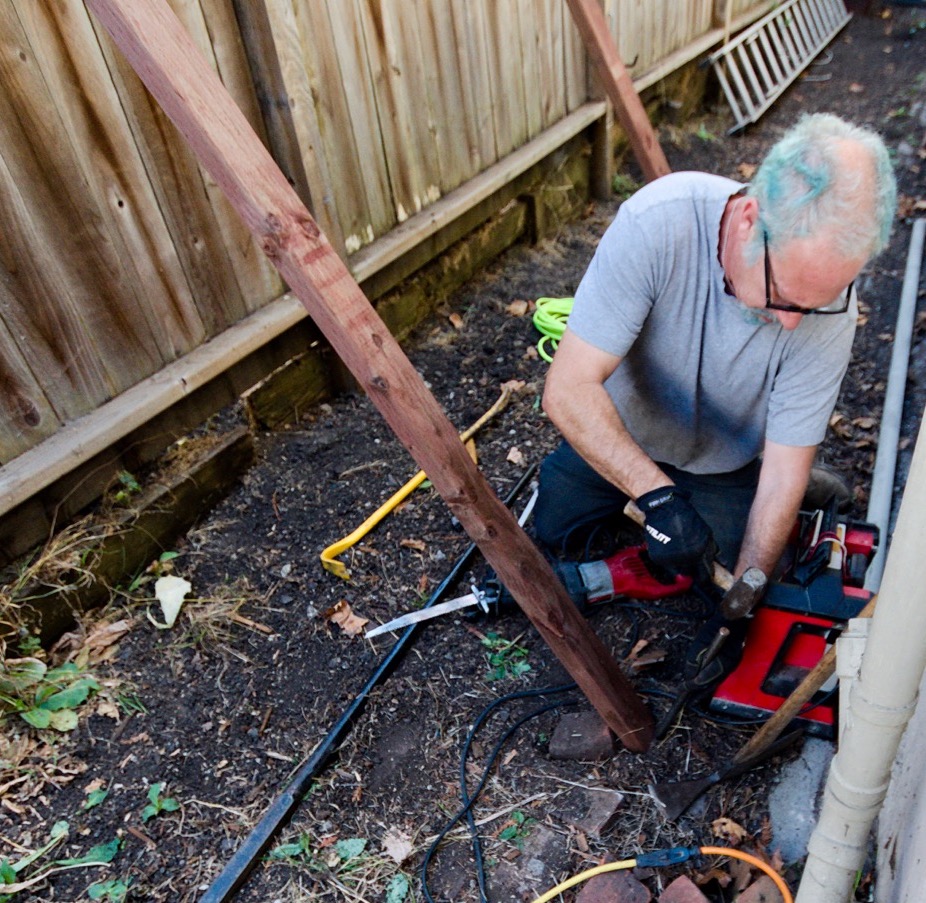
Before you begin work, make sure the fence won’t fall over. I use some 2x4s and some concrete form anchors – round steel rods that I drive into the ground. You could also use 2’ lengths of rebar. (Back to top)
I removed one picket on either side of the post. Careful – sometimes these are fragile enough that they break and can’t be reattached and must be replaced. (Back to top)
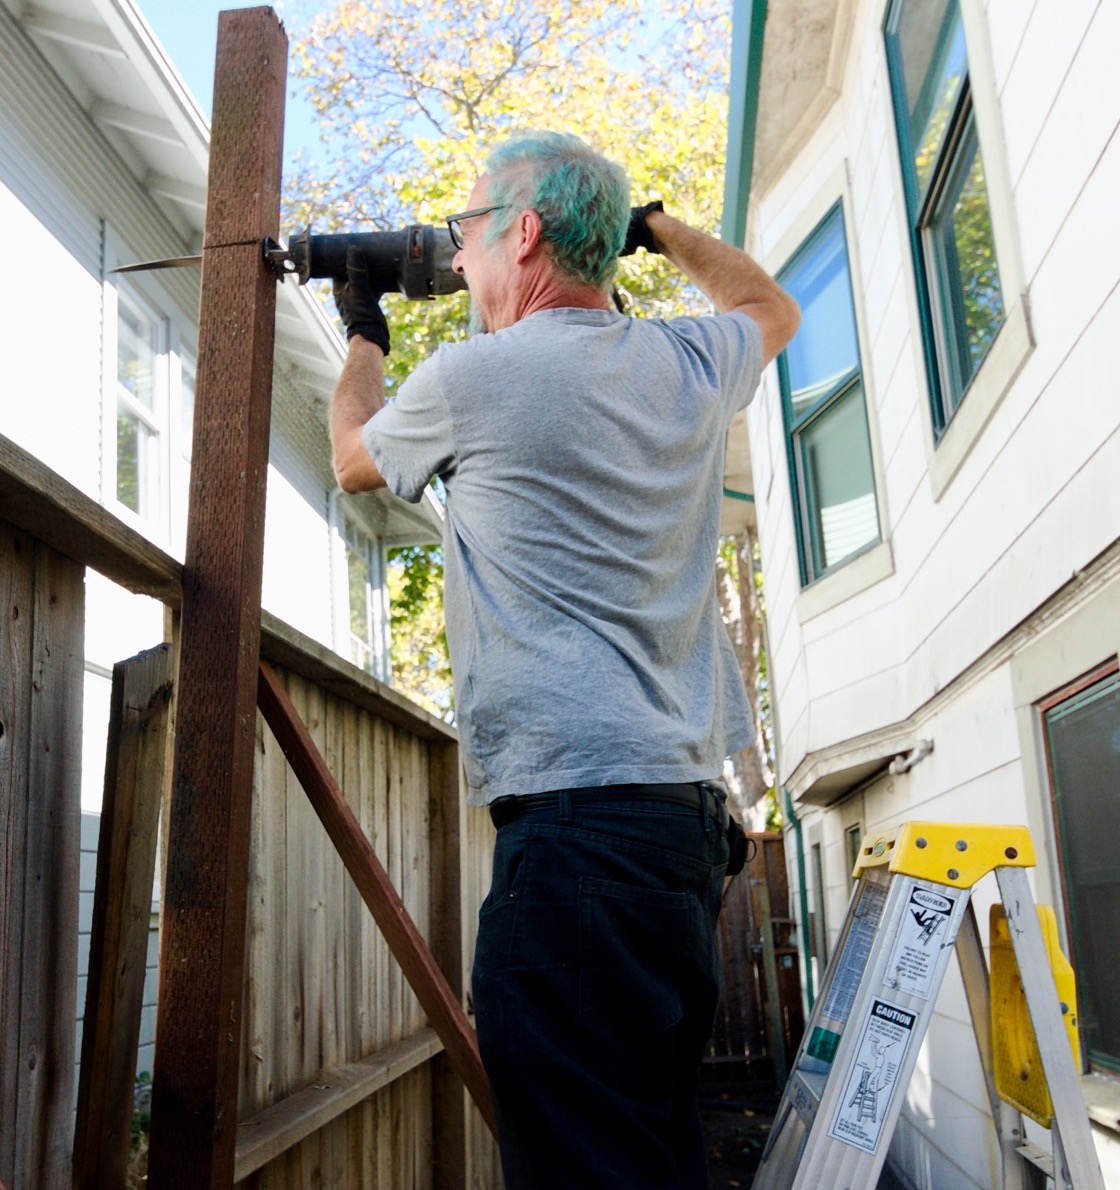
If the fence was assembled with nails, cut the fasteners using a sawzall with a carbide blade designed for nail-embedded wood. If it is held together with screws remove the screws if you can. Screws are made with harder steel and they will ruin the blade or wear it faster. (Back to top)
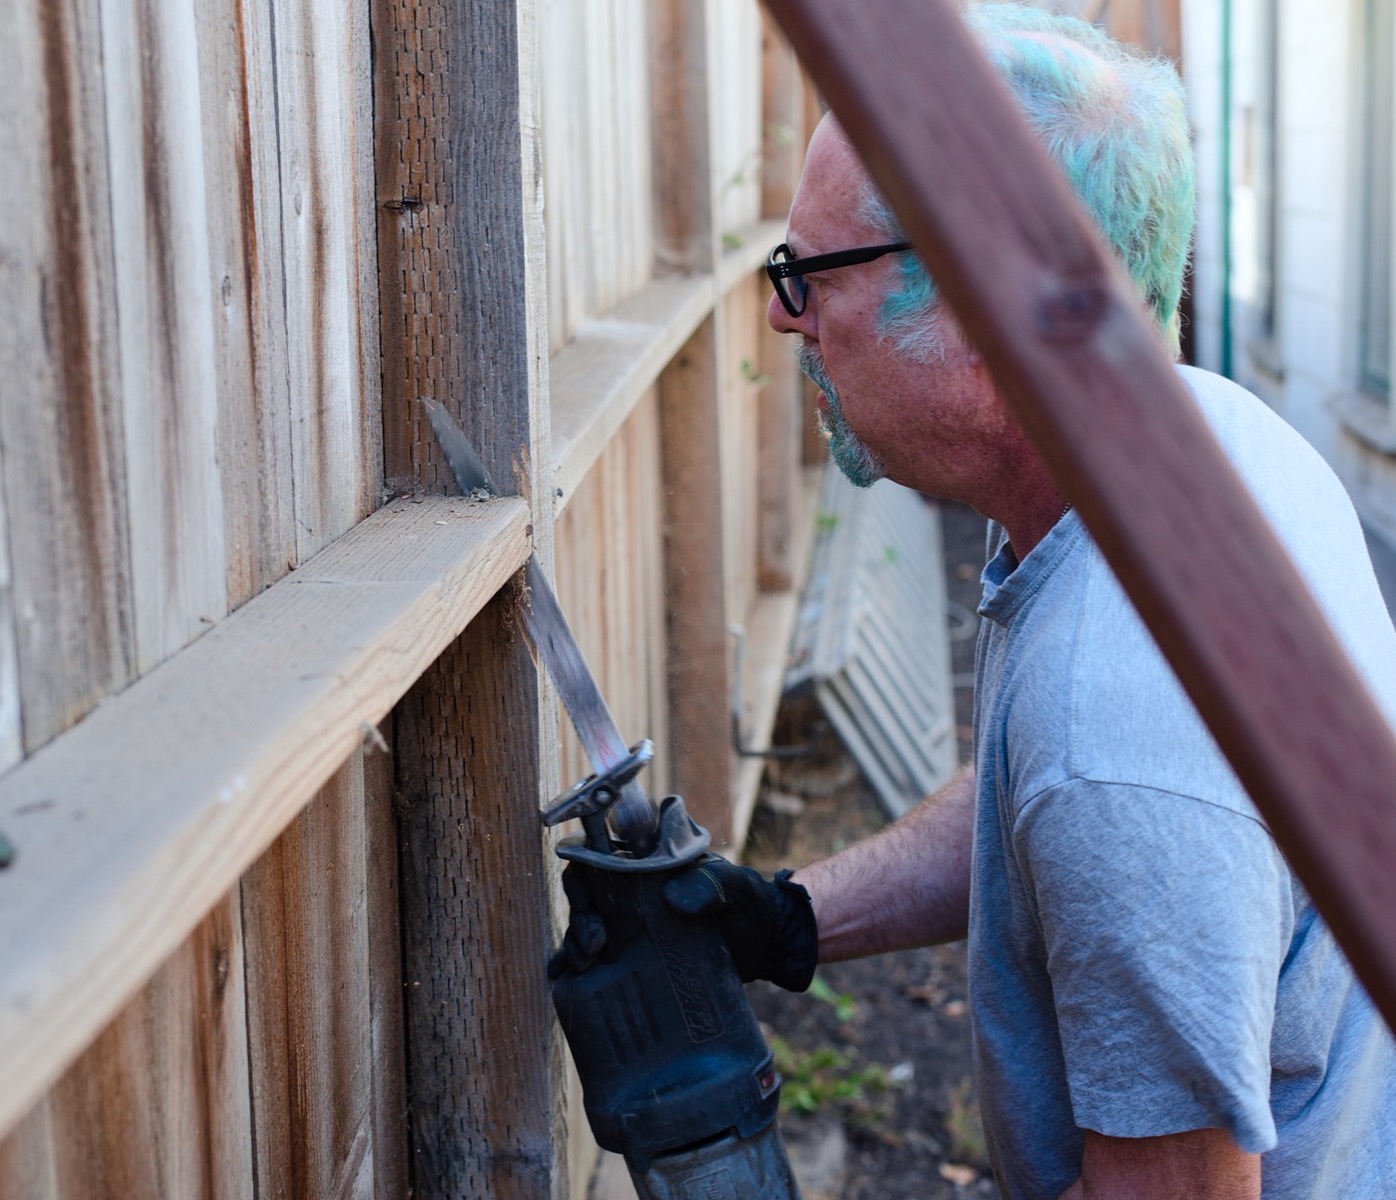
Cut all the nails or remove any screws to isolate the post. (Back to top)
Having a hard time removing Philips head screws because they strip?
STOP USING PHILLIPS HEAD SCREWS! THEY STRIP!
I use T25 torx head screws. I’ve never had one strip and have used many thousands of them.
Phillips head screws are only superior to flat-head screws, which are so bad, so very, very bad, that the only thing worse than a flat head is a round drive screw. Haven’t seen a round drive screw? That is what remains after a Phillips head strips out.
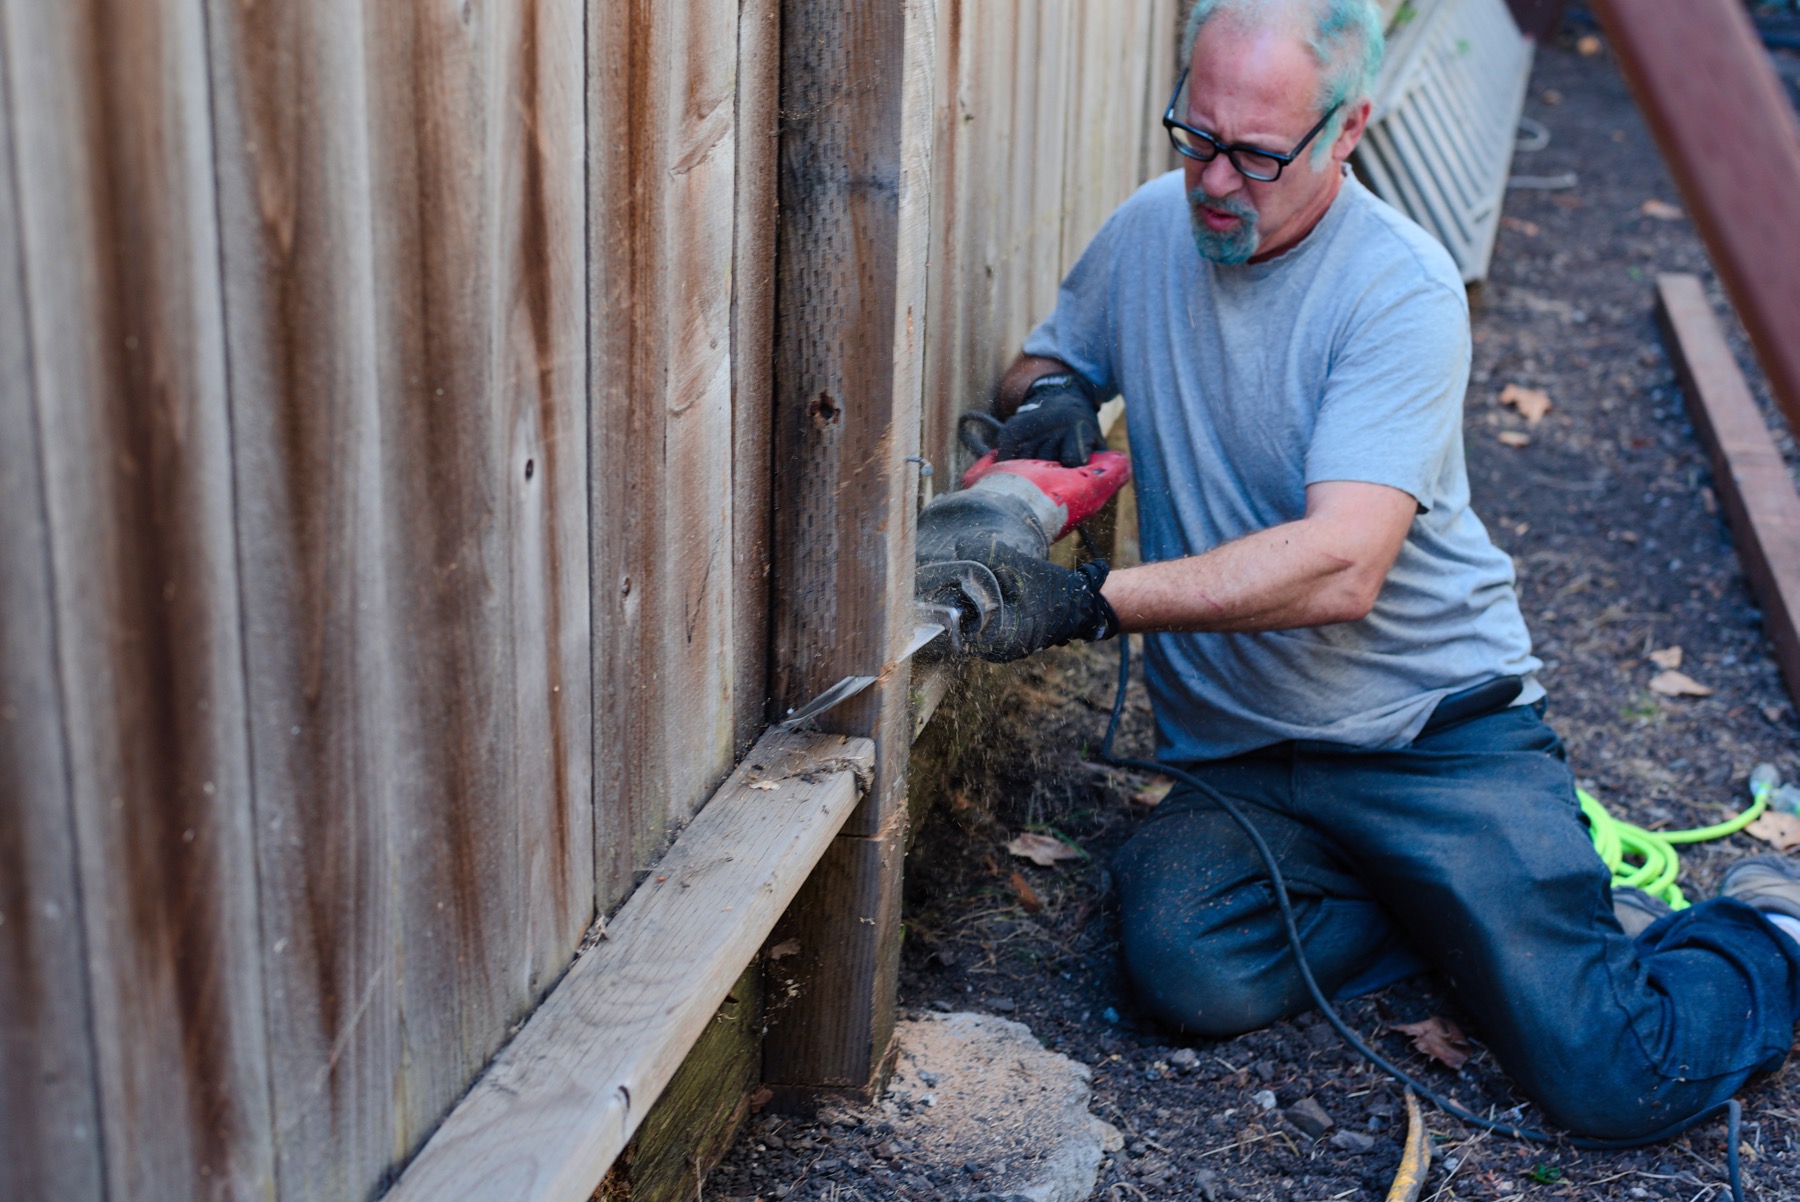
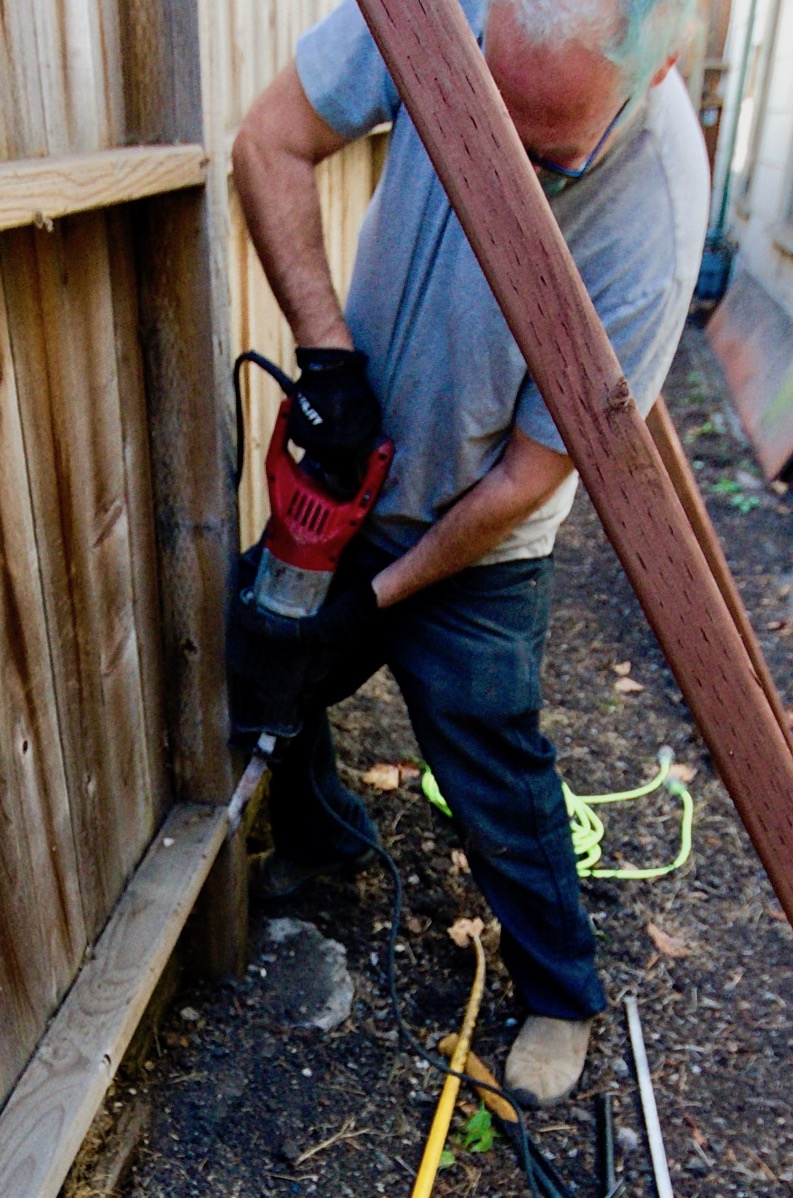
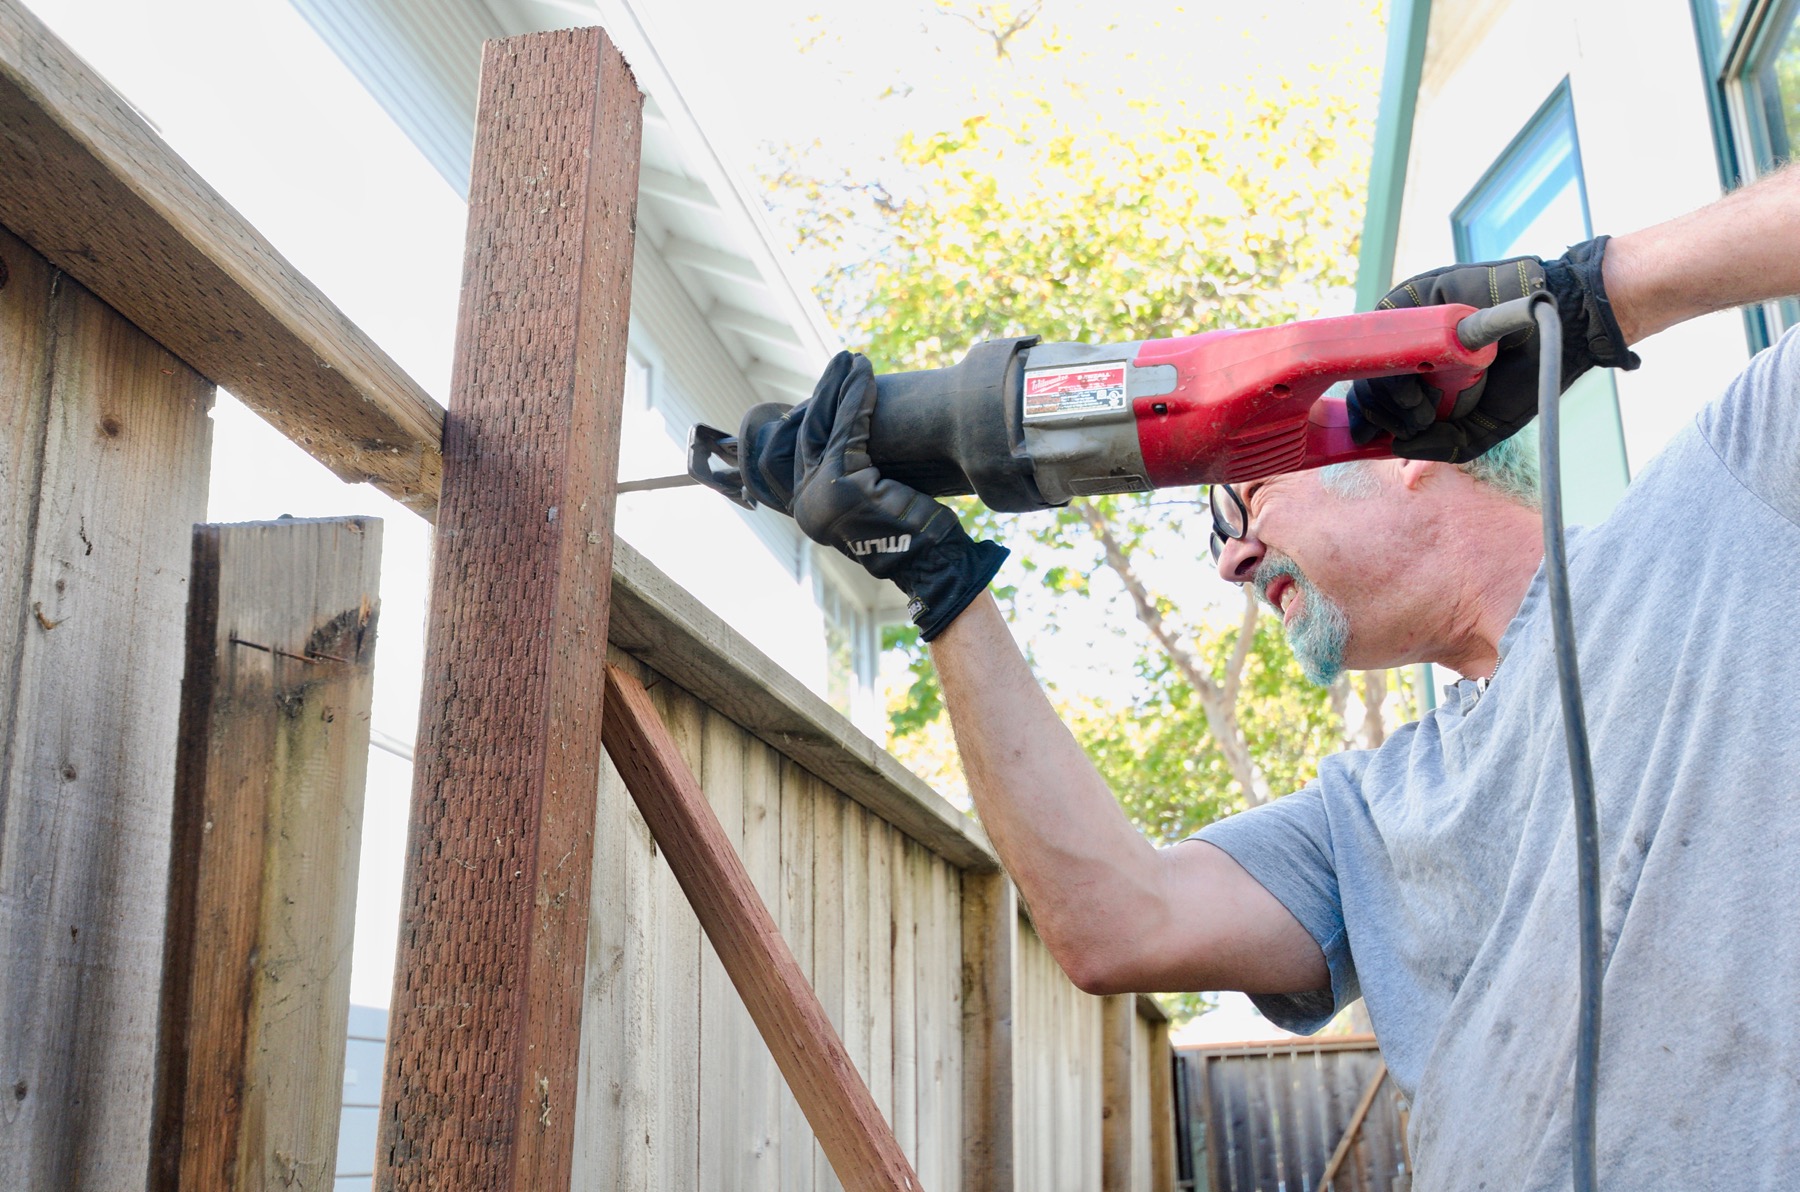
Cut above the lower lateral. (Back to top)
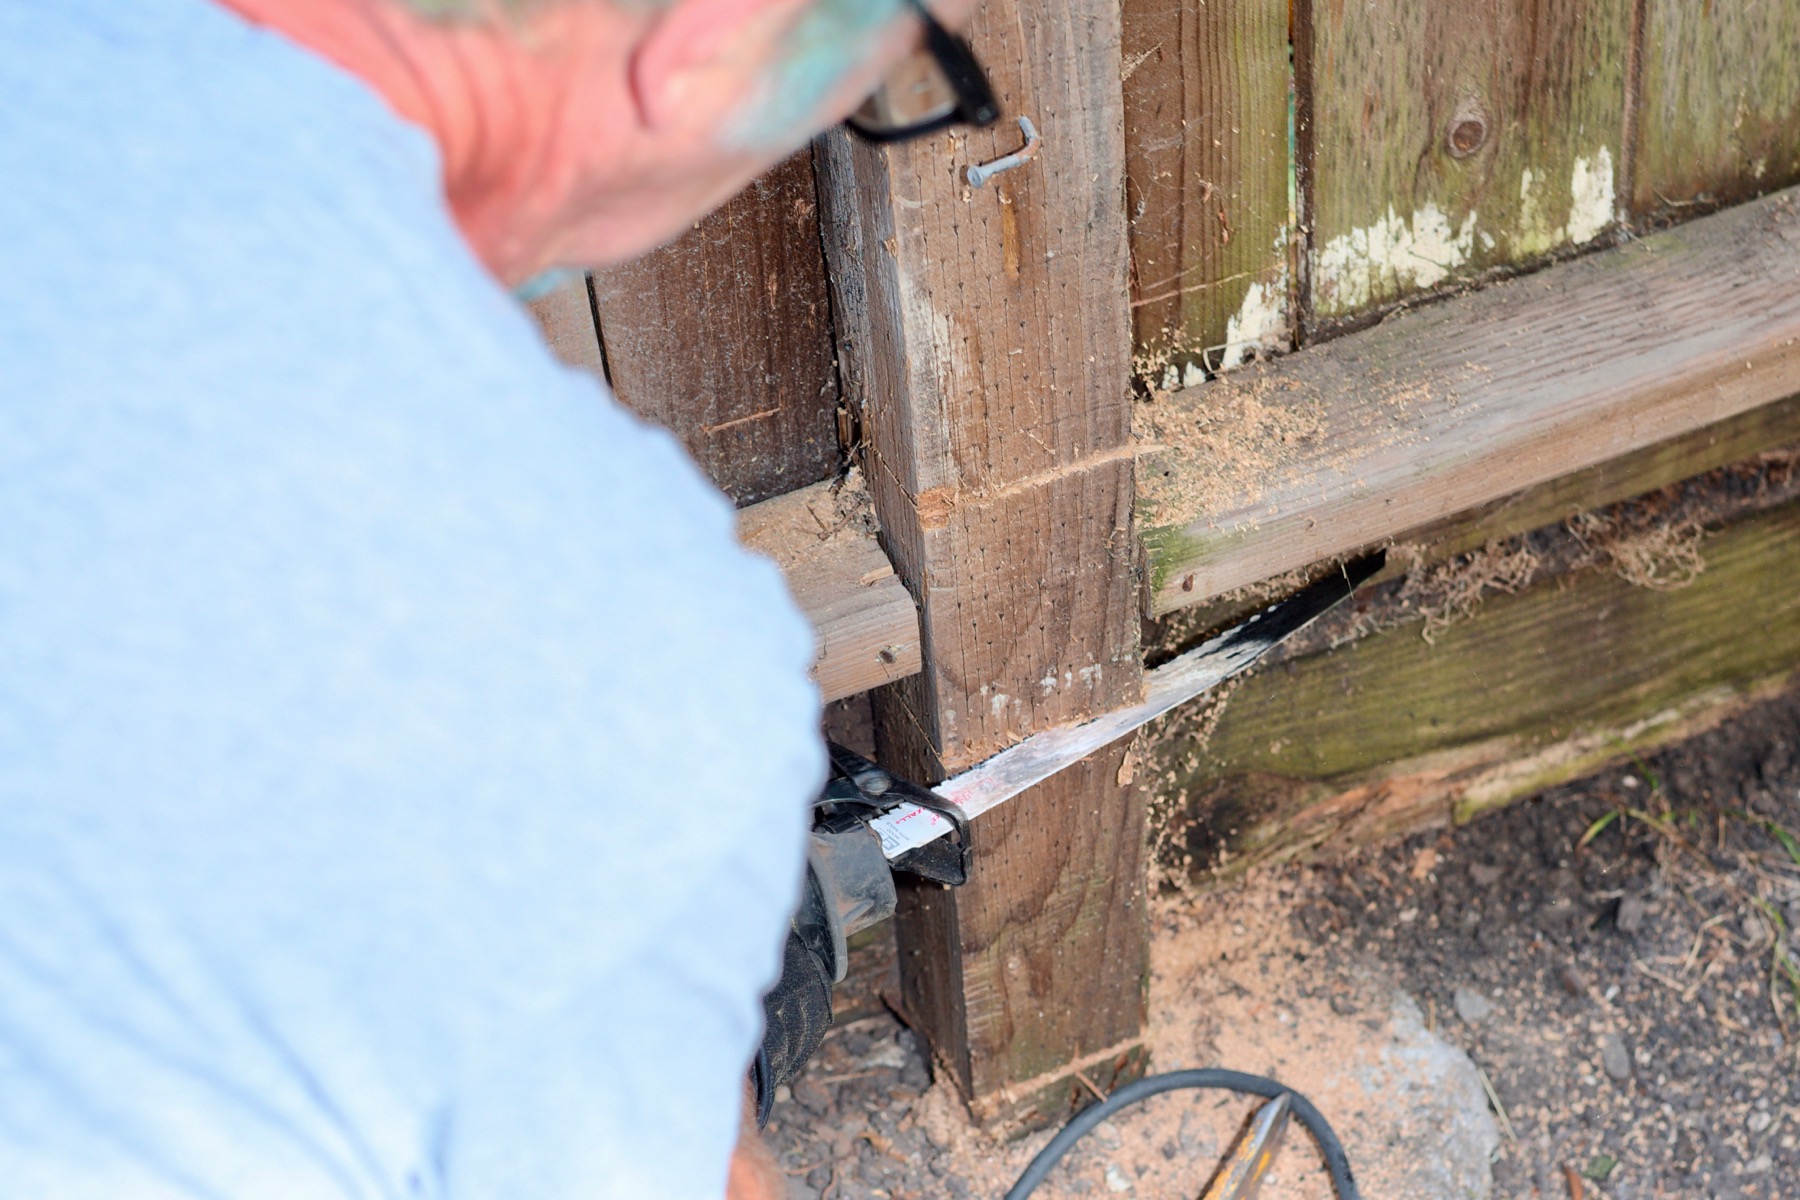
Cut below the lower lateral. (Back to top)
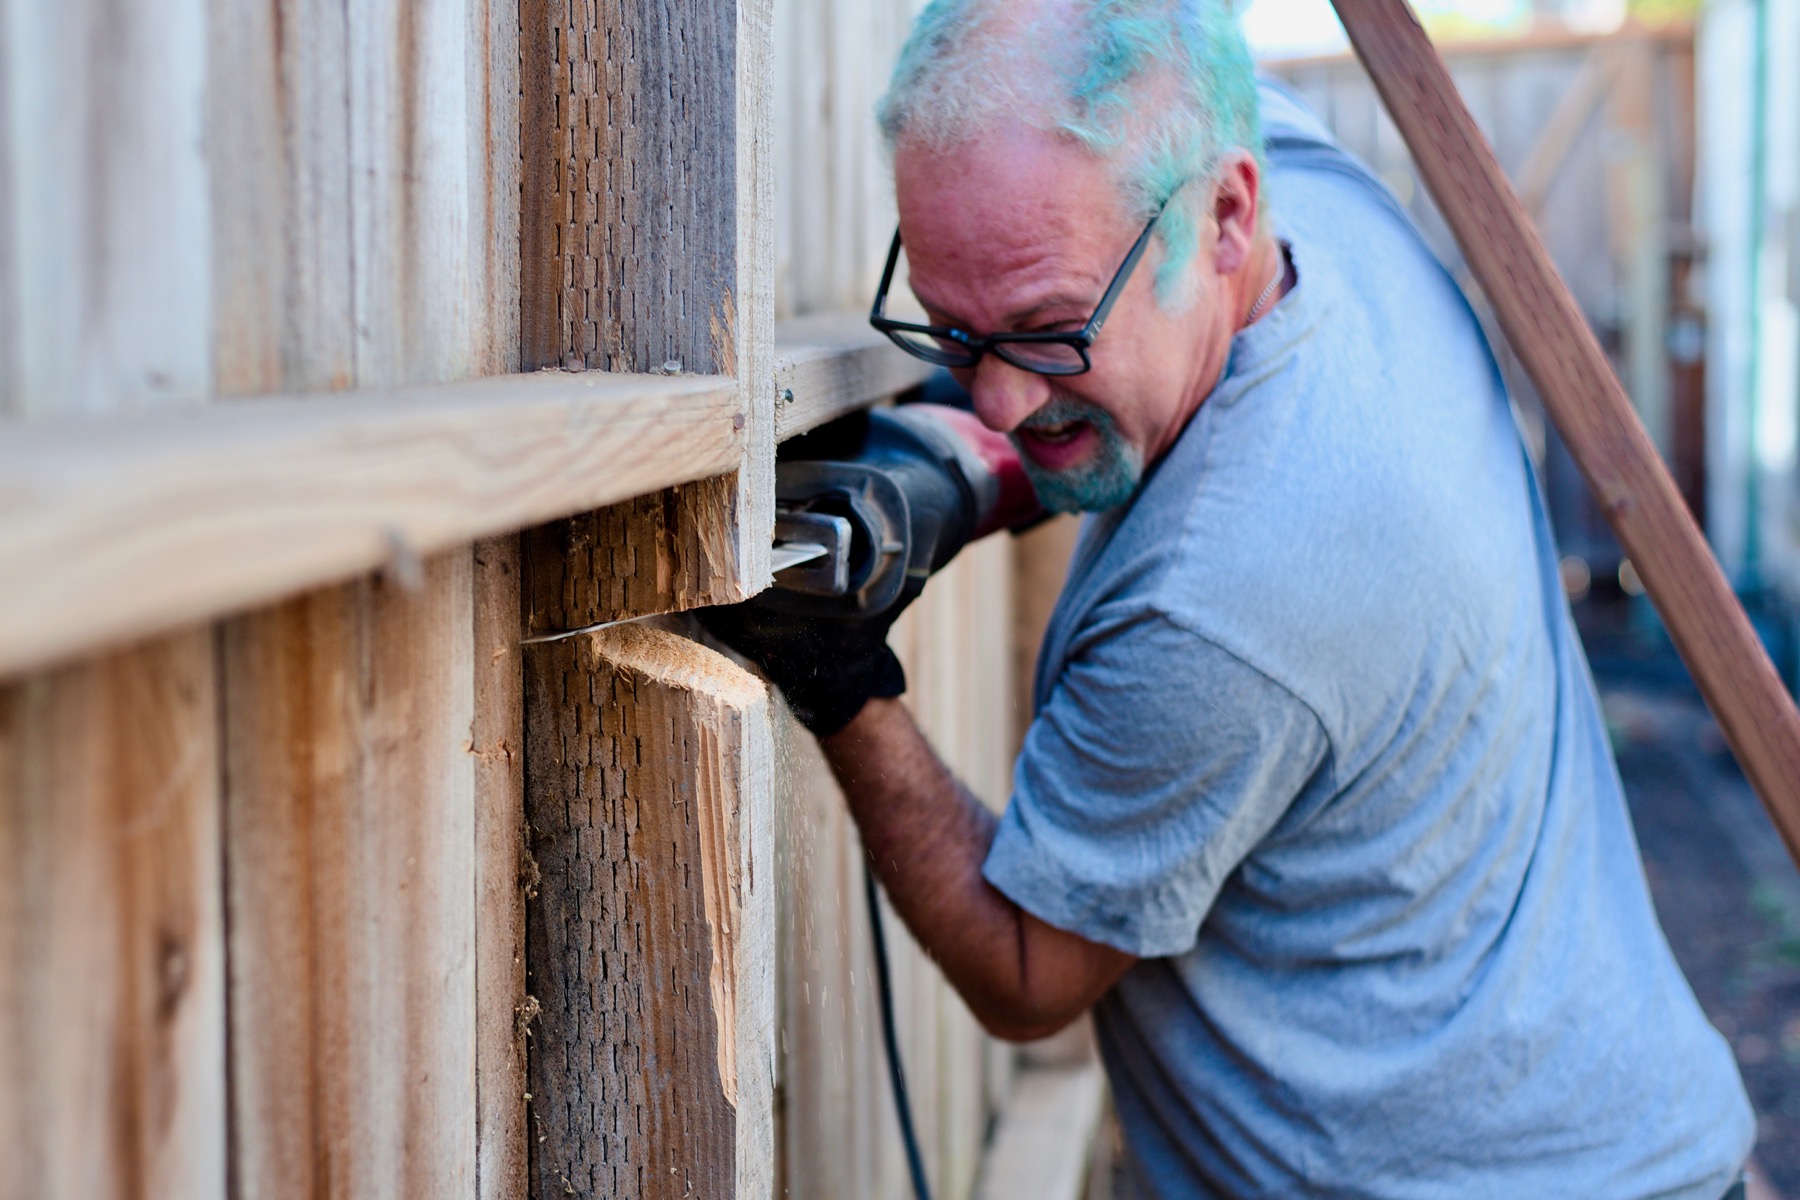
Cut the middle of the post. (Back to top)
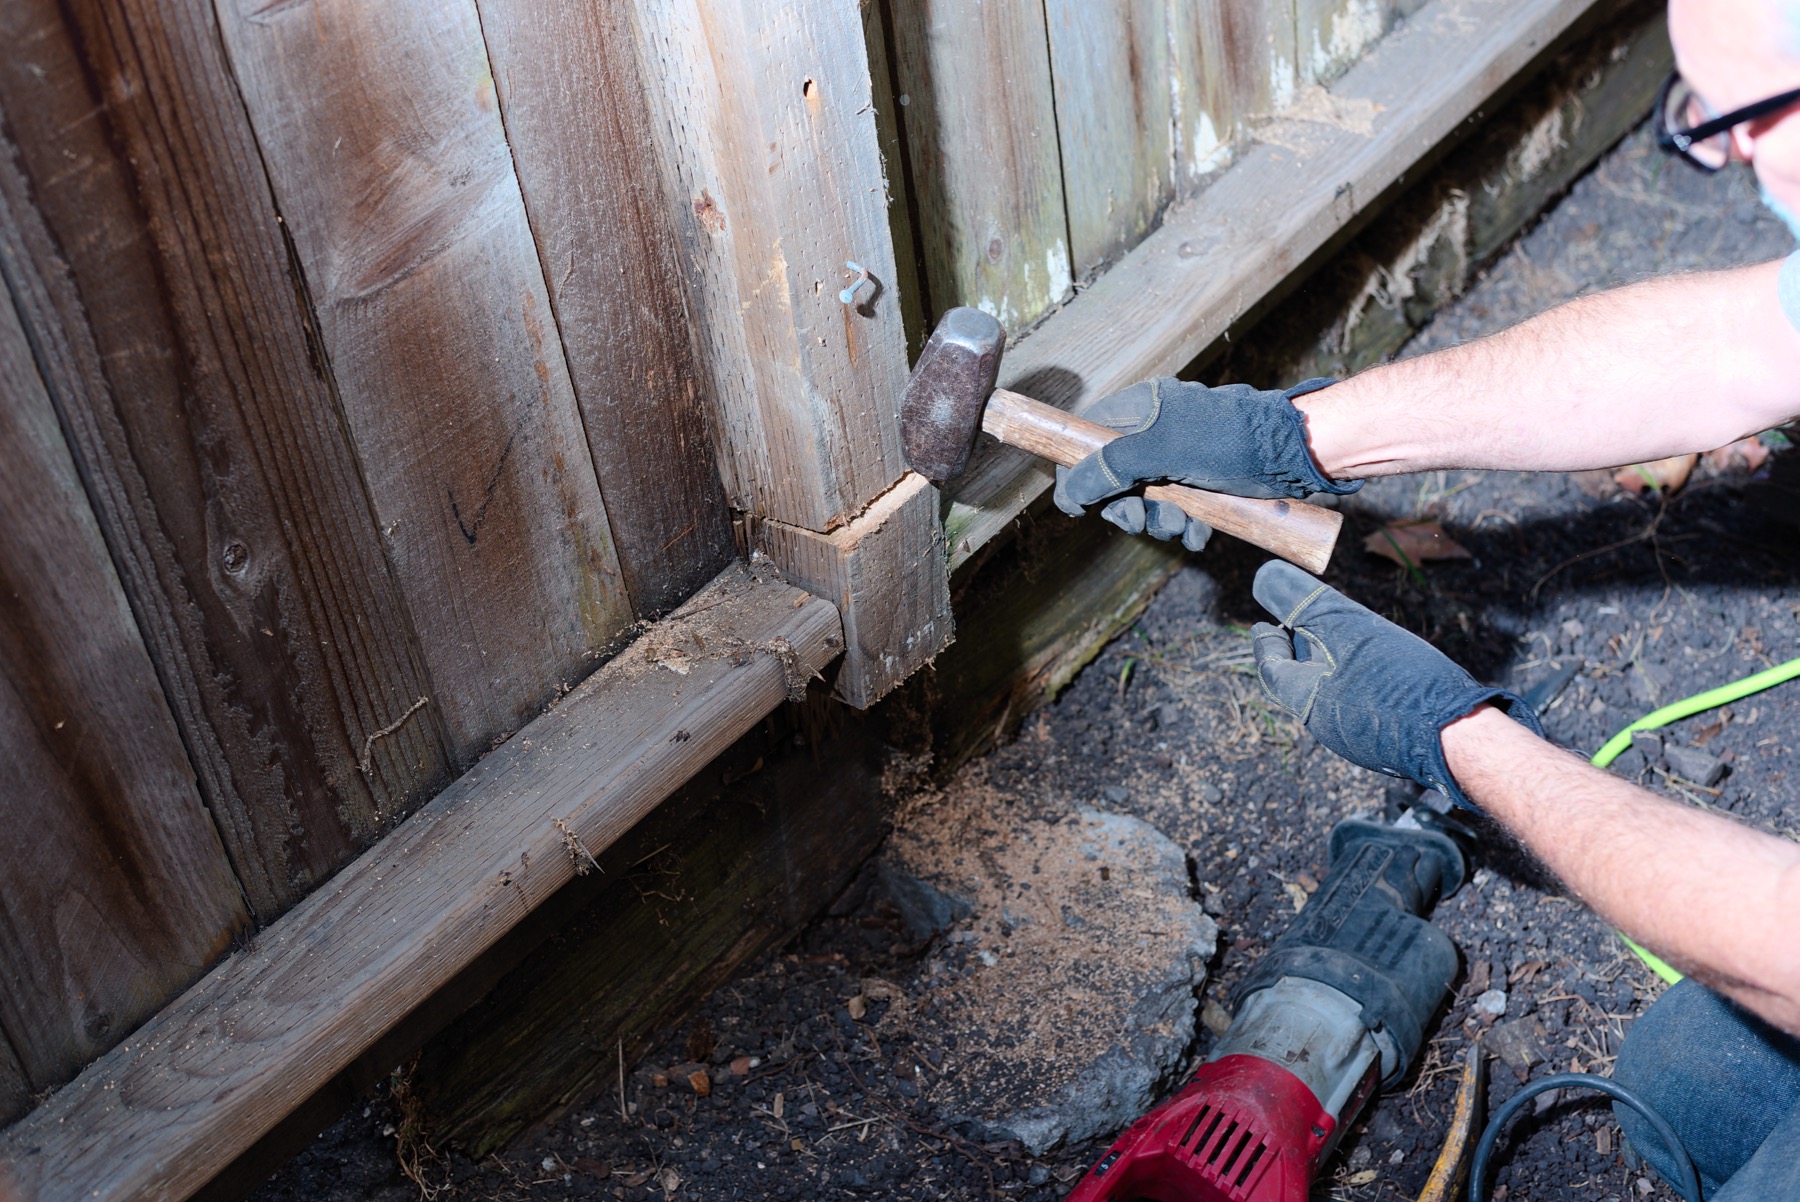
Break out the section between the cuts. Sometimes a hammer is enough to knock it out. (Back to top)
Sometimes a crowbar is enough to pry it out. (Back to top)
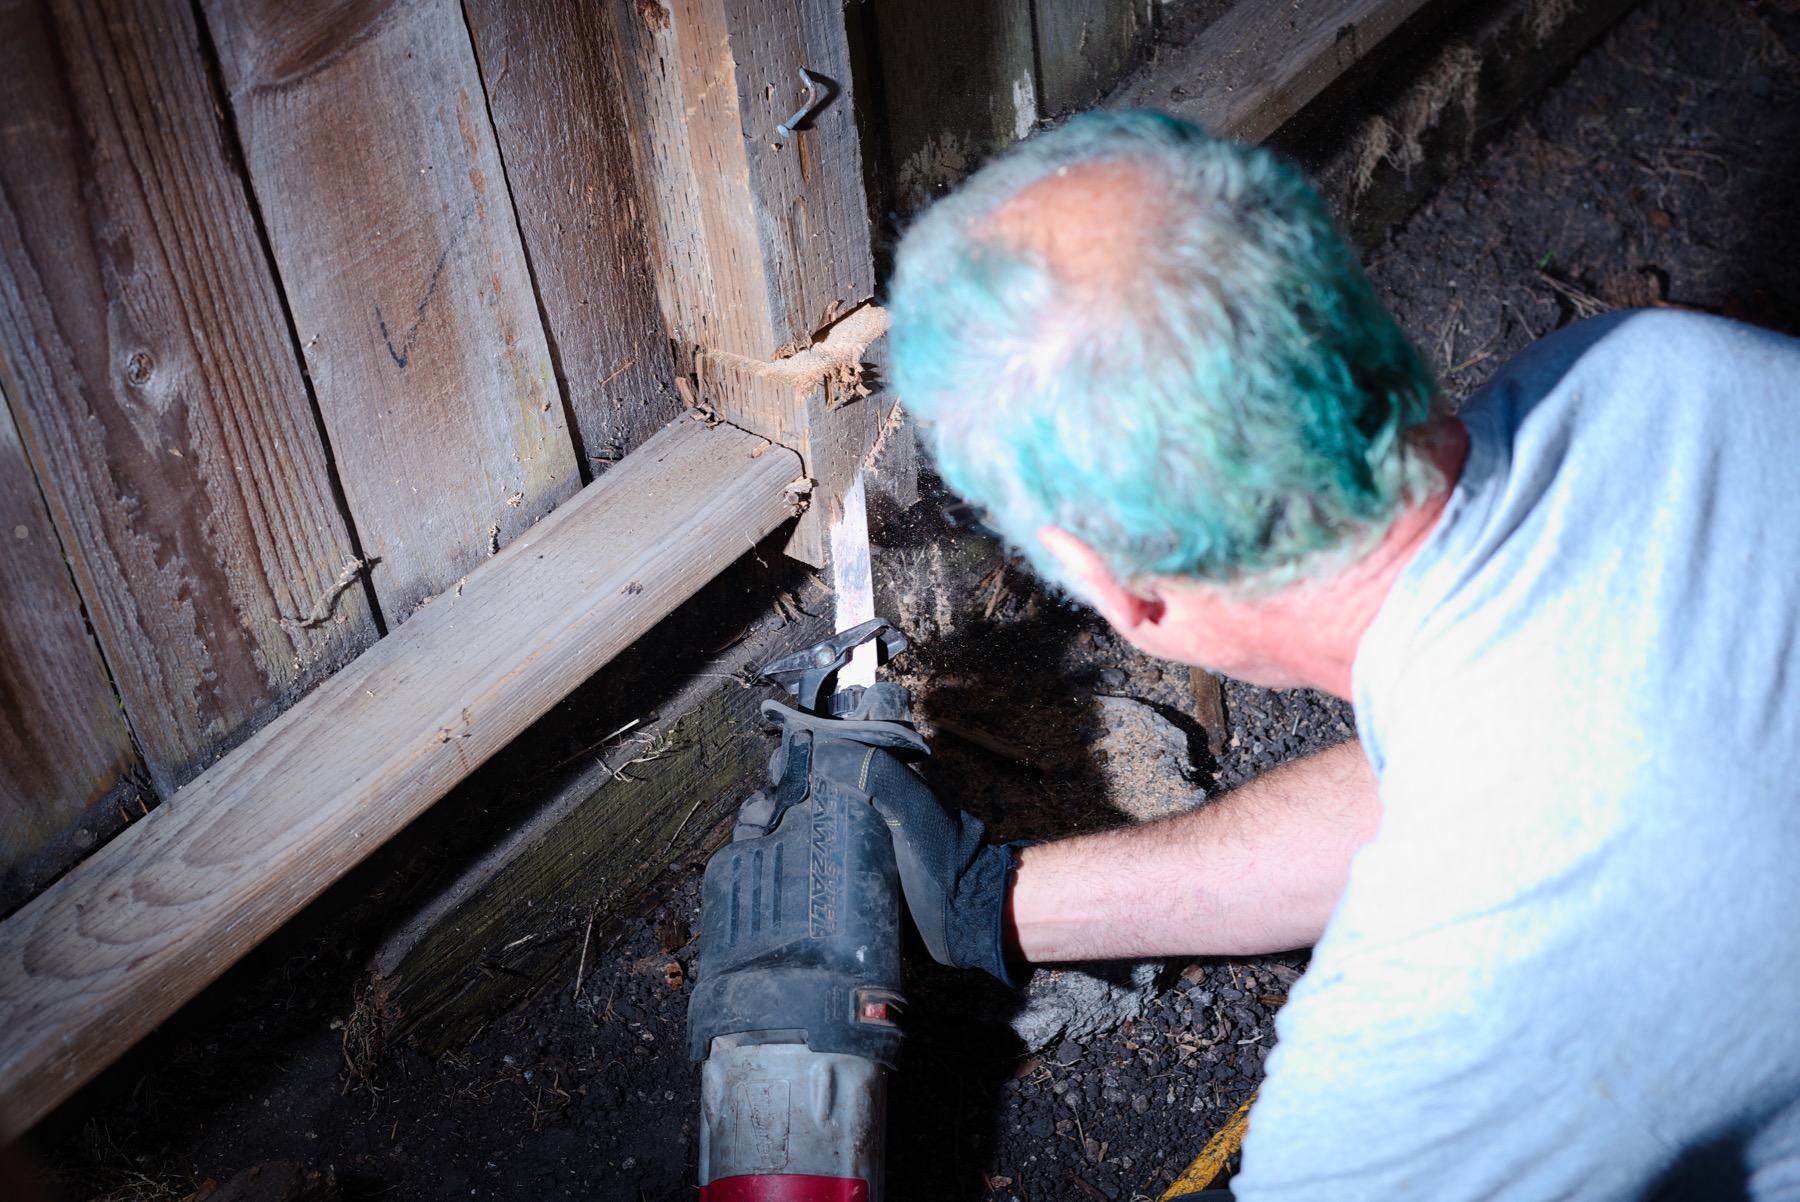
Sometimes you have to cut it out. (Back to top)
The post was also secured to the retaining wall. I used a claw hammer to remove those nails. I could also have cut them with a sawzall, but it was easier to use the hammer. (Back to top)
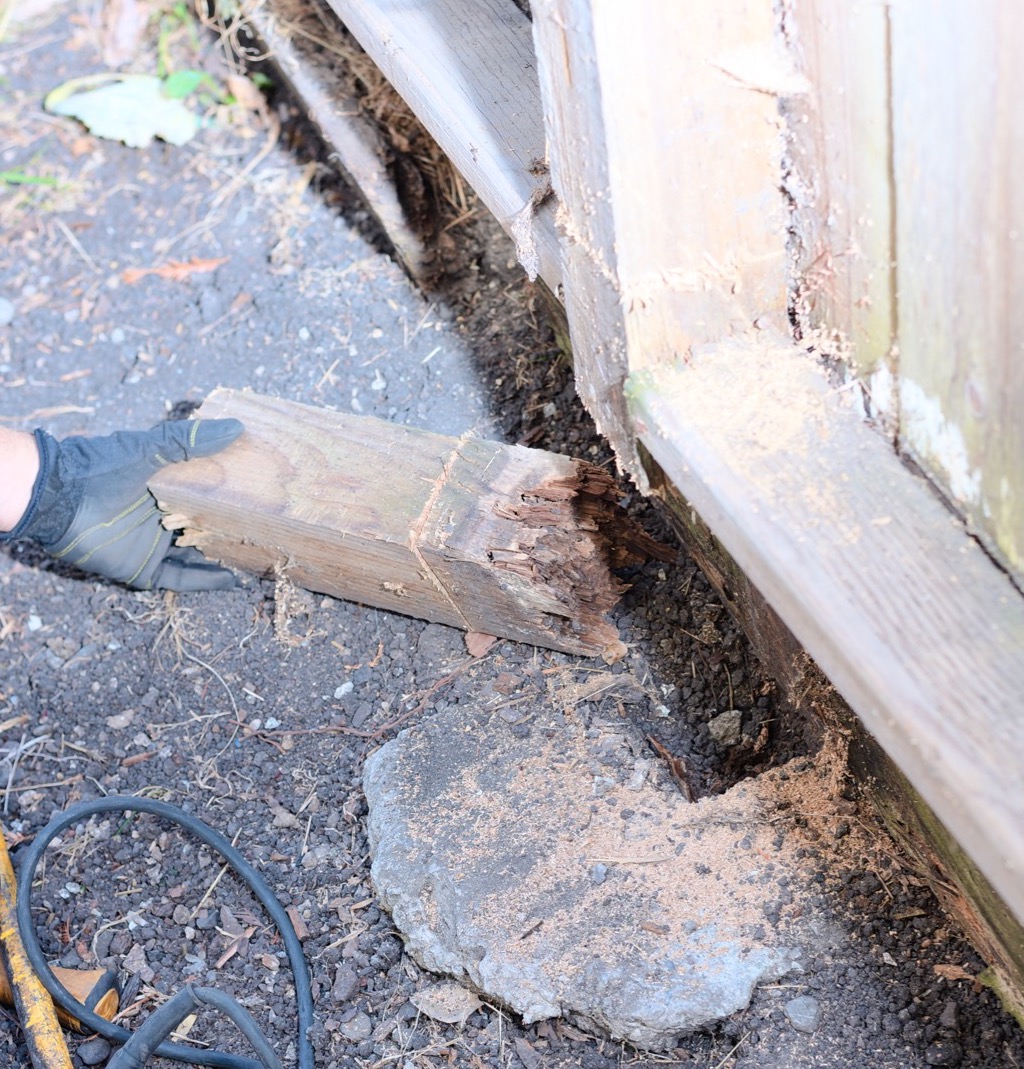
The post simply comes right out, because it is rotted. How deep do you think the rot goes? (Back to top)
Dig out the old post from the post base
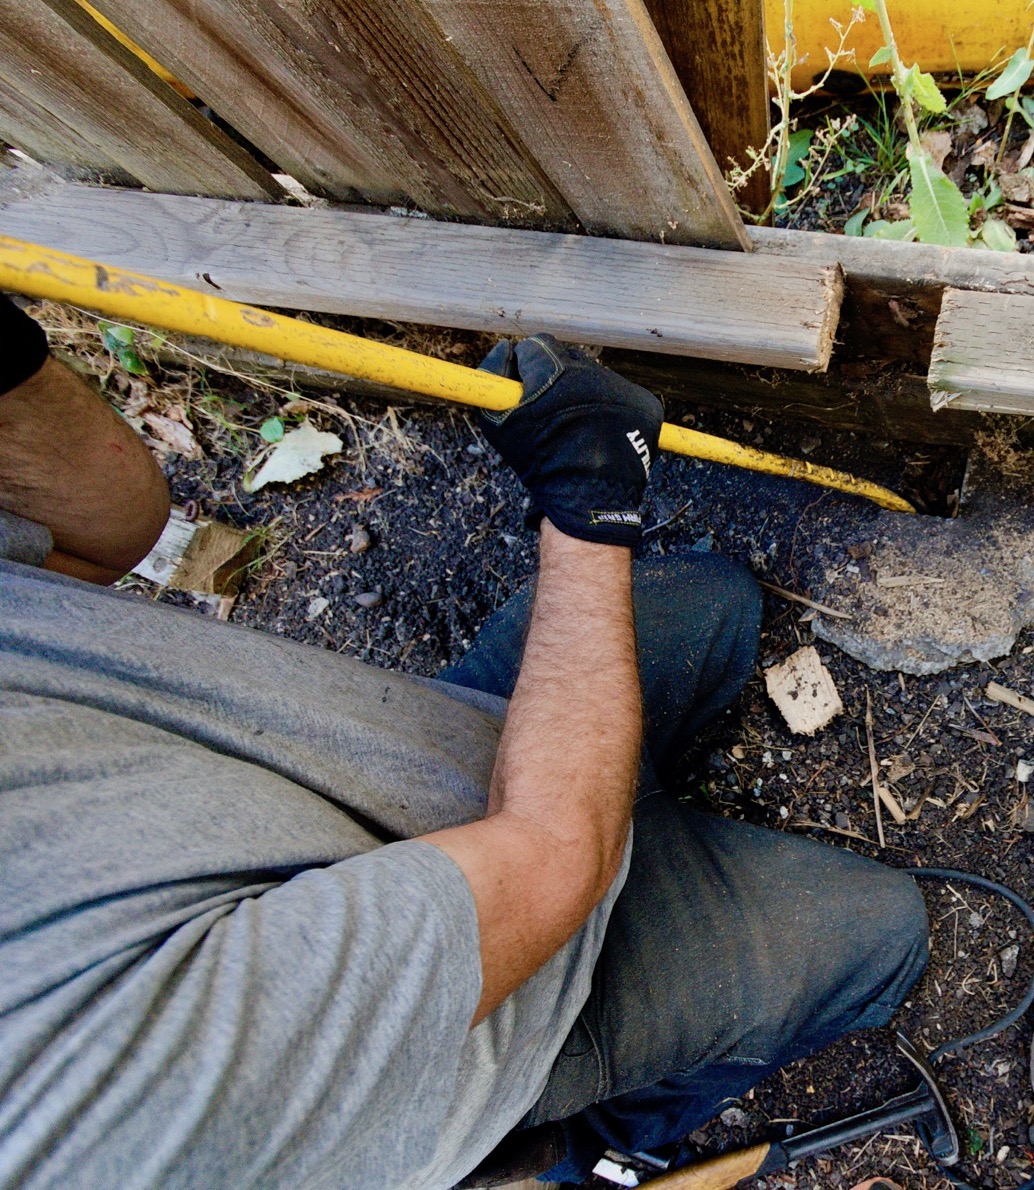
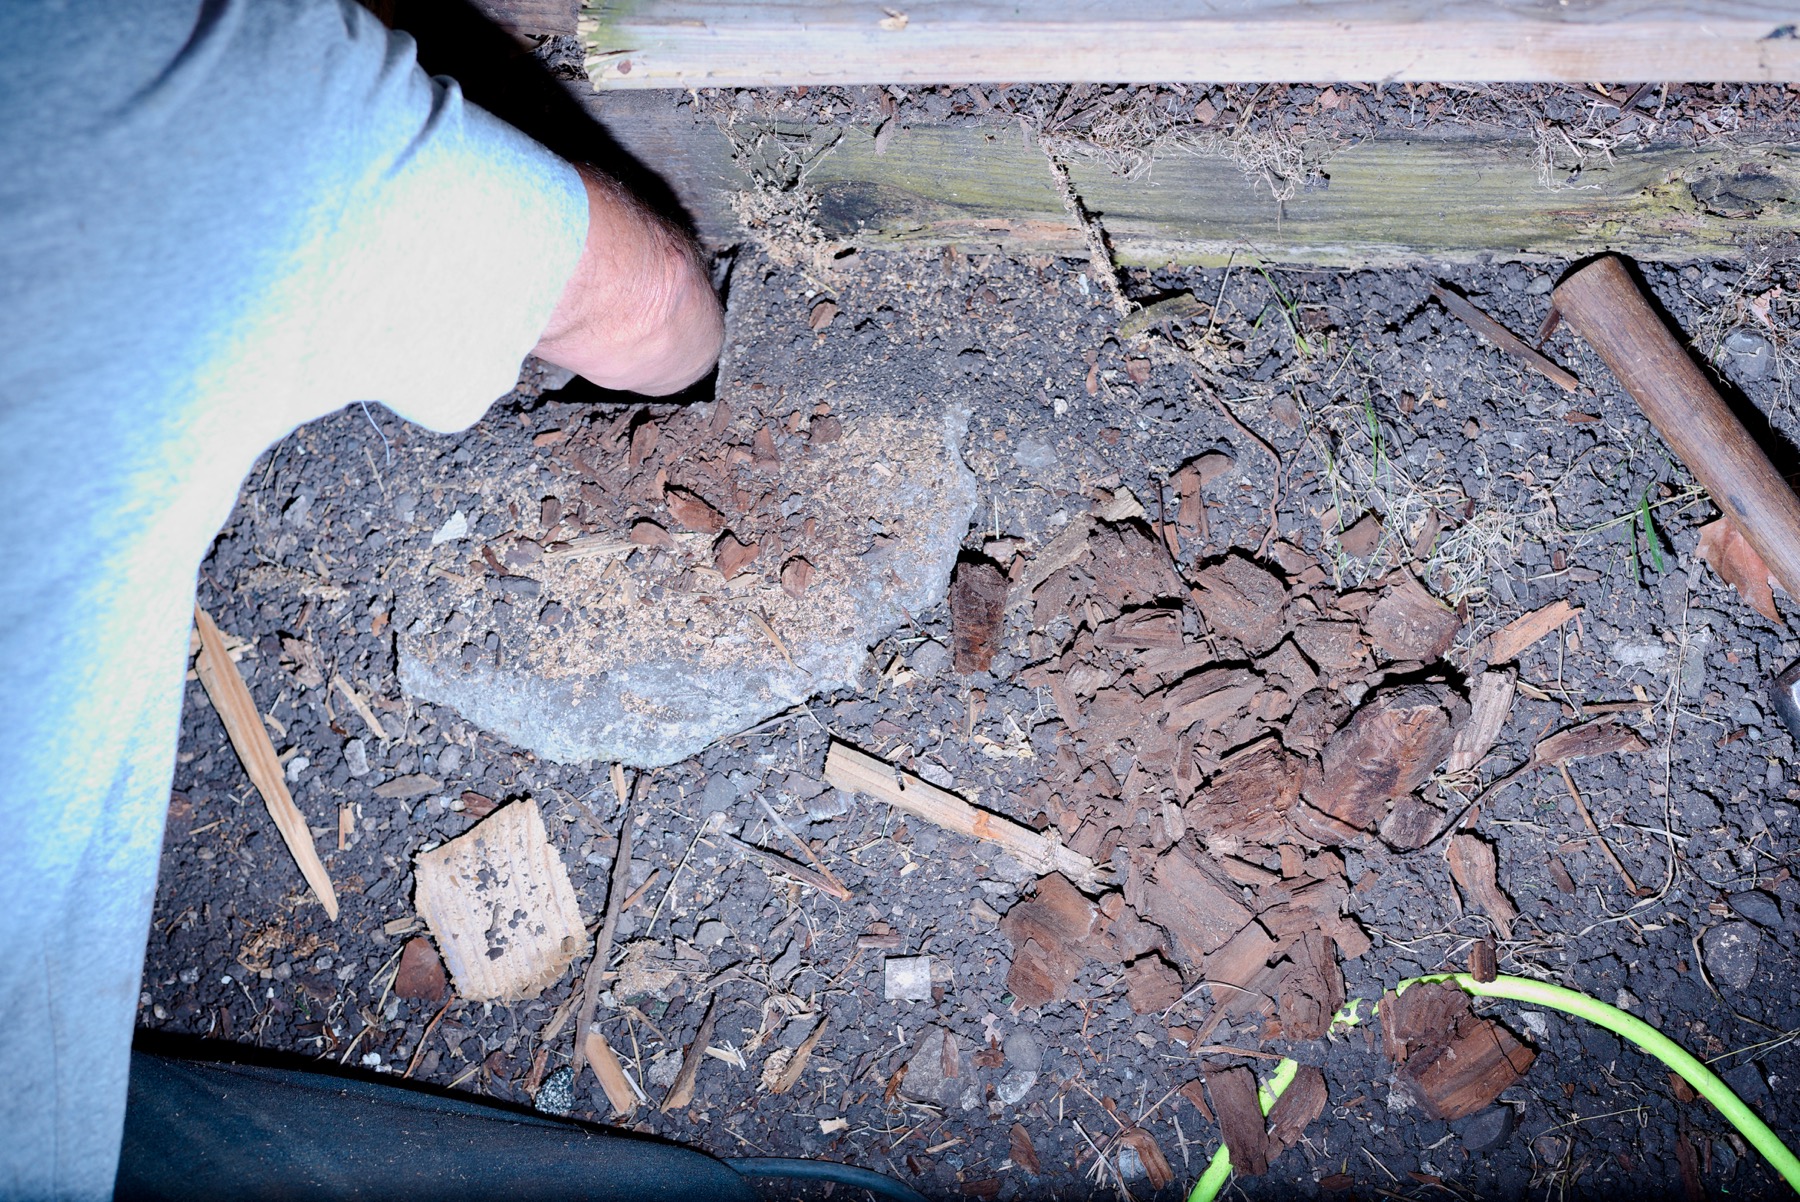
Start with a crowbar. The top of this post was completely rotted. I could almost have dug it out with my fingers alone, but I used a crowbar prying to crush the rotted wood toward the middle. (Back to top of this section)(Back to top)
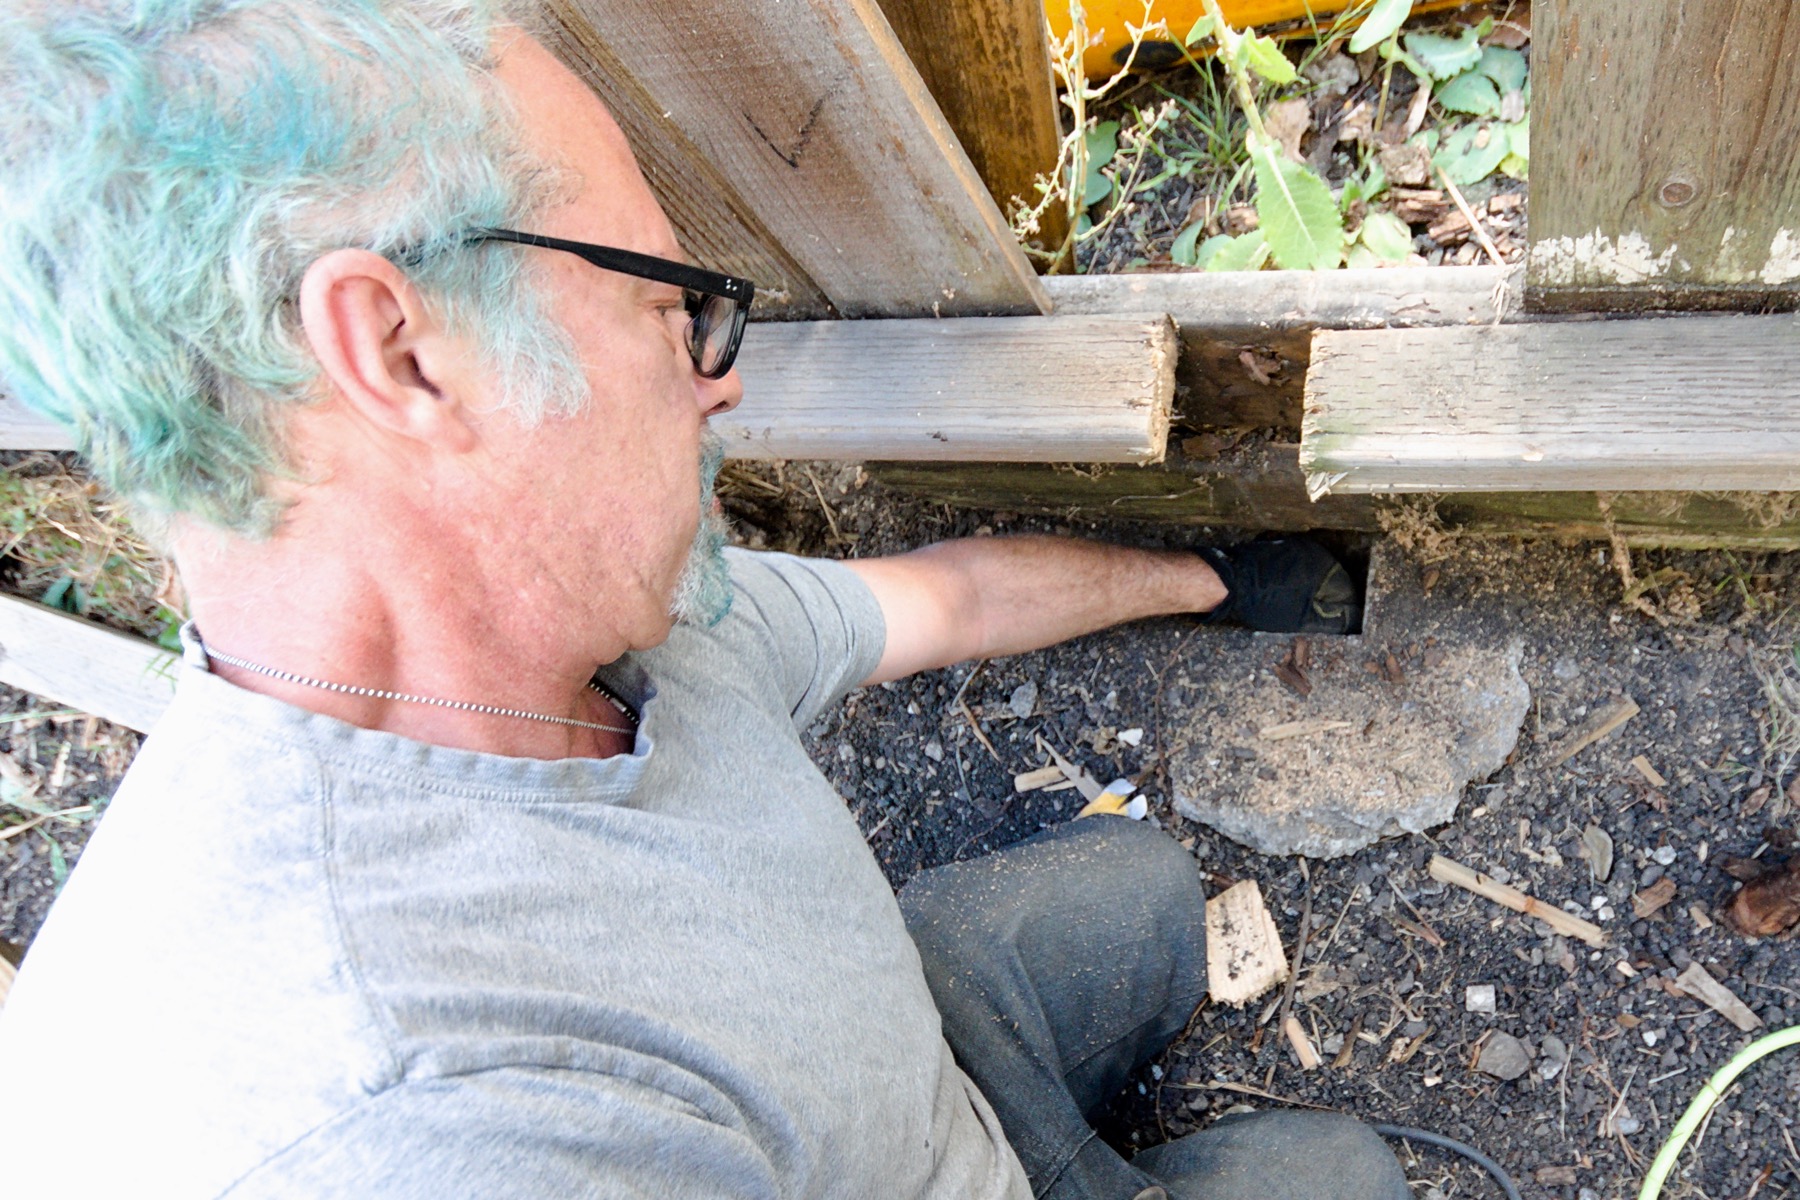
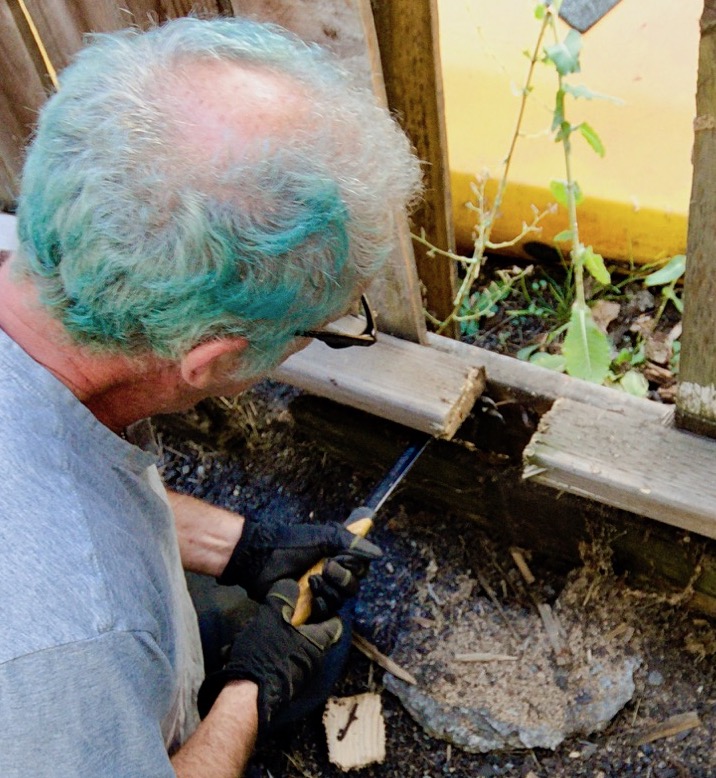
After crushing from all sides toward the middle I use my hand to remove the rotted wood that has come loose. (Back to top of this section)(Back to top)

Keep using the crowbar to crush the rotted wood toward the middle from all sides and after working your way all the way around the post hole, remove the debris with your hand. (Back to top of this section)(Back to top)
Why are we replacing this post?
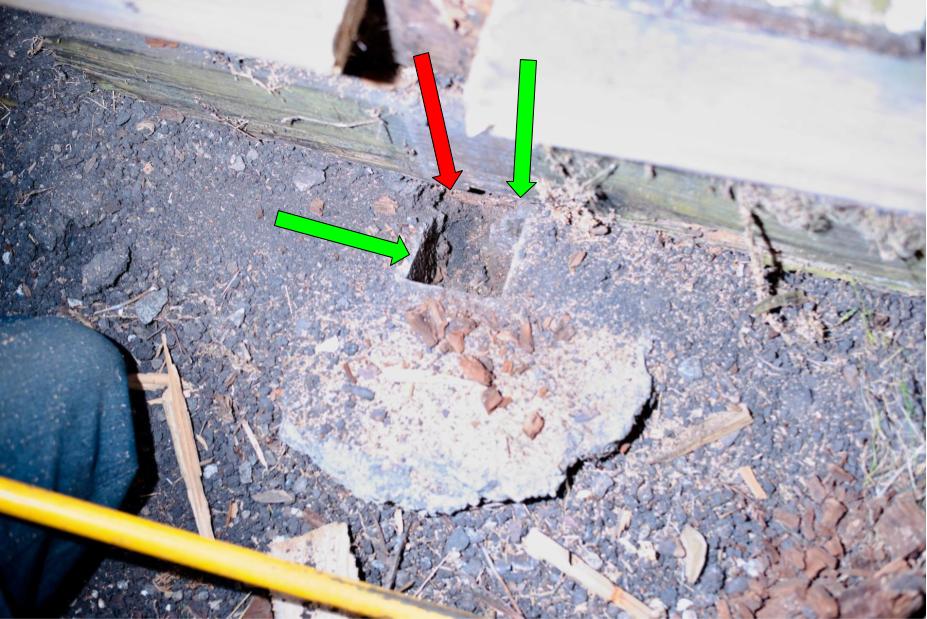
The problem is that the concrete post base did not completely surround the post. There is some concrete missing. I’d guess it was incorrectly poured – not enough concrete was used and there was a gap. Another possibility is that the concrete didn’t have enough water and it never hardened. Over time it deteriorated. However it happened, the concrete is gone from the far side, as indicated by the red arrow. The green arrows point to where the concrete is good. Click the image for a larger version.
(Back to top of this section)(Back to top)
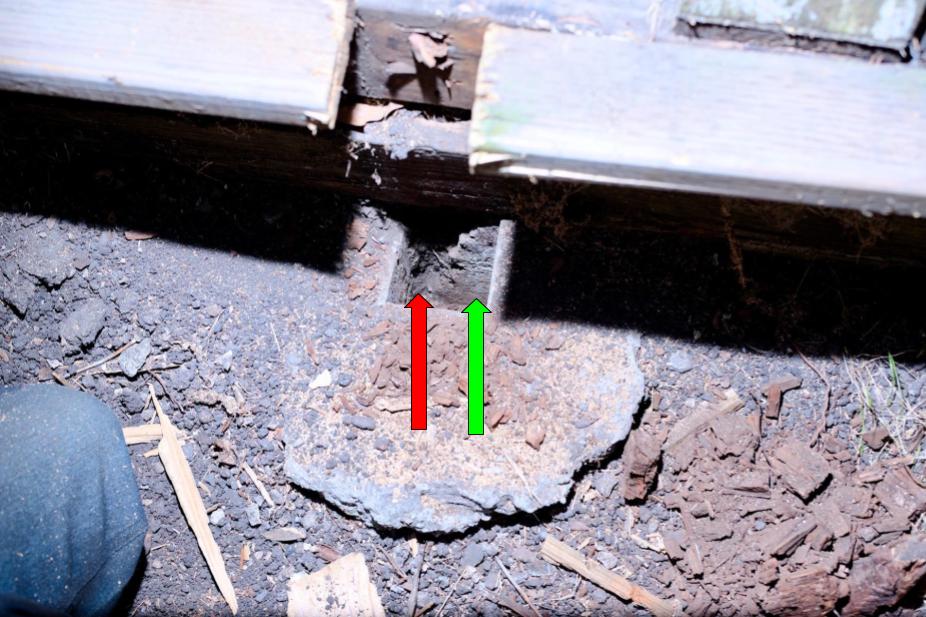
The red arrow points to missing concrete. The green arrows point to where the concrete is good. Click the image for a larger version.
(Back to top of this section)(Back to top)
Keep digging. The pile of rotted wood grows. It is all rotted because water runs downhill, into the post base, through the defect in the concrete. The post remains saturated in wet weather and rots. That is why I use a layer of water seal on the part of the post that will be underground. It won’t prevent rot forever, but it slows it down because there is a layer of plastic between the wood and the concrete.
(Back to top of this section)(Back to top)
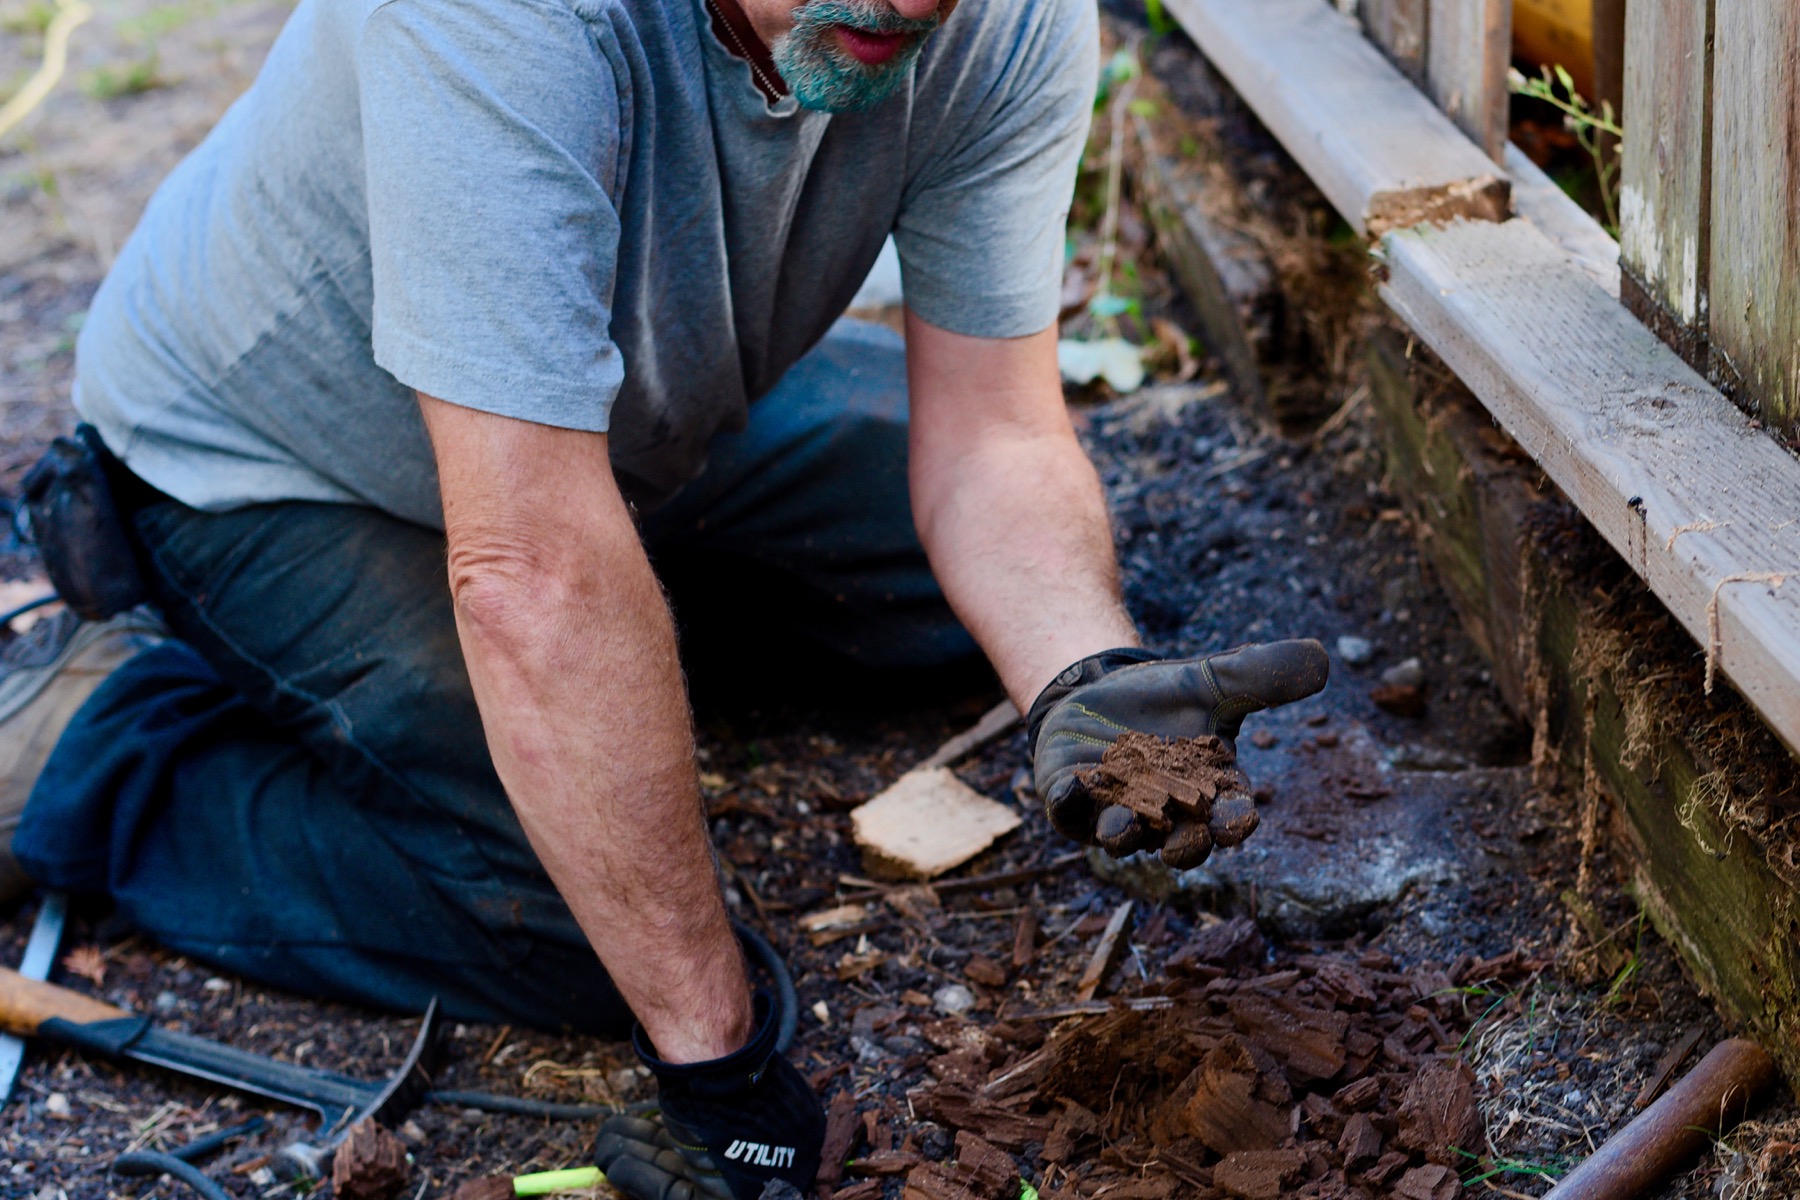
The rotted post inside the post base might have chunks of wood, or it may have deteriorated completely into dirt. If you find what looks like small gravel and sand it probably means some part of the post base has deteriorated.
(Back to top of this section)(Back to top)
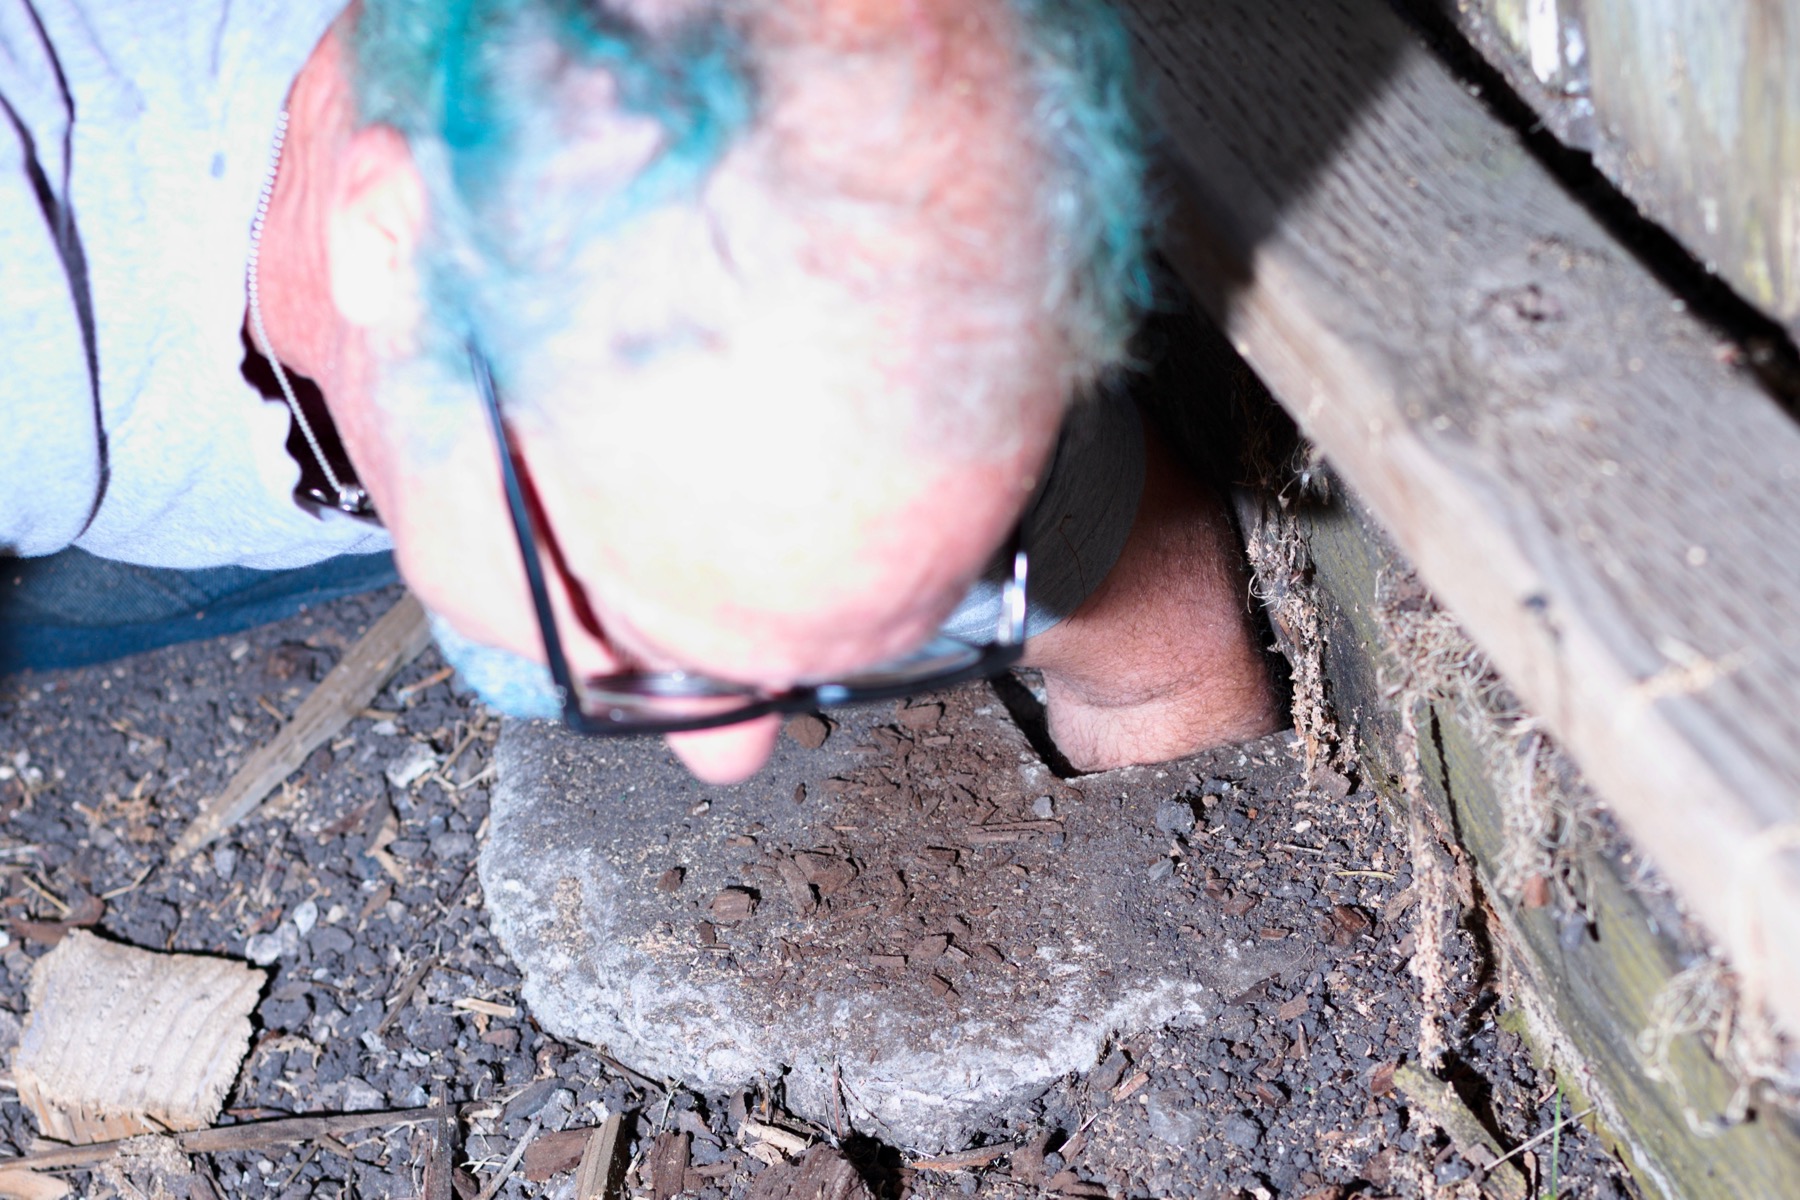
Keep digging and using the crowbar until you are as deep as your elbow, or about 14”
Stop for a moment and imagine how difficult it would be to snap a 4×4 about 14” from the end: pretty hard. After you drive a post in this far, it would take that much force to displace it.
(Back to top of this section)(Back to top)
Drive a new post into the post base
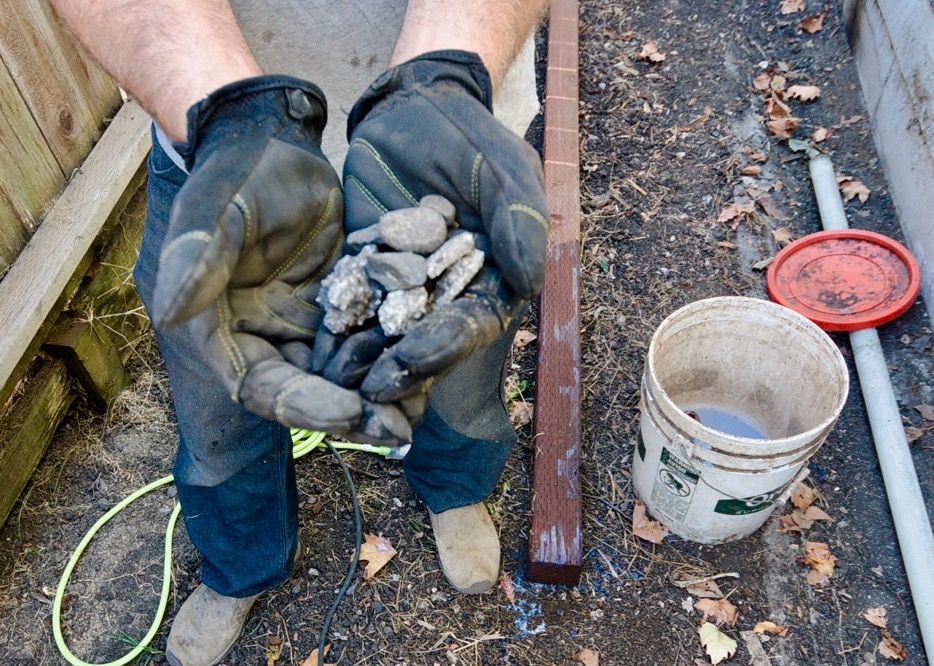
First, gather some small rocks and put them into the newly cleared post base. I like to use about two handfuls. The new post will rest on these so that water can drain away from the post base instead of being held next to it by soil. (Back to top of this section)(Back to top)
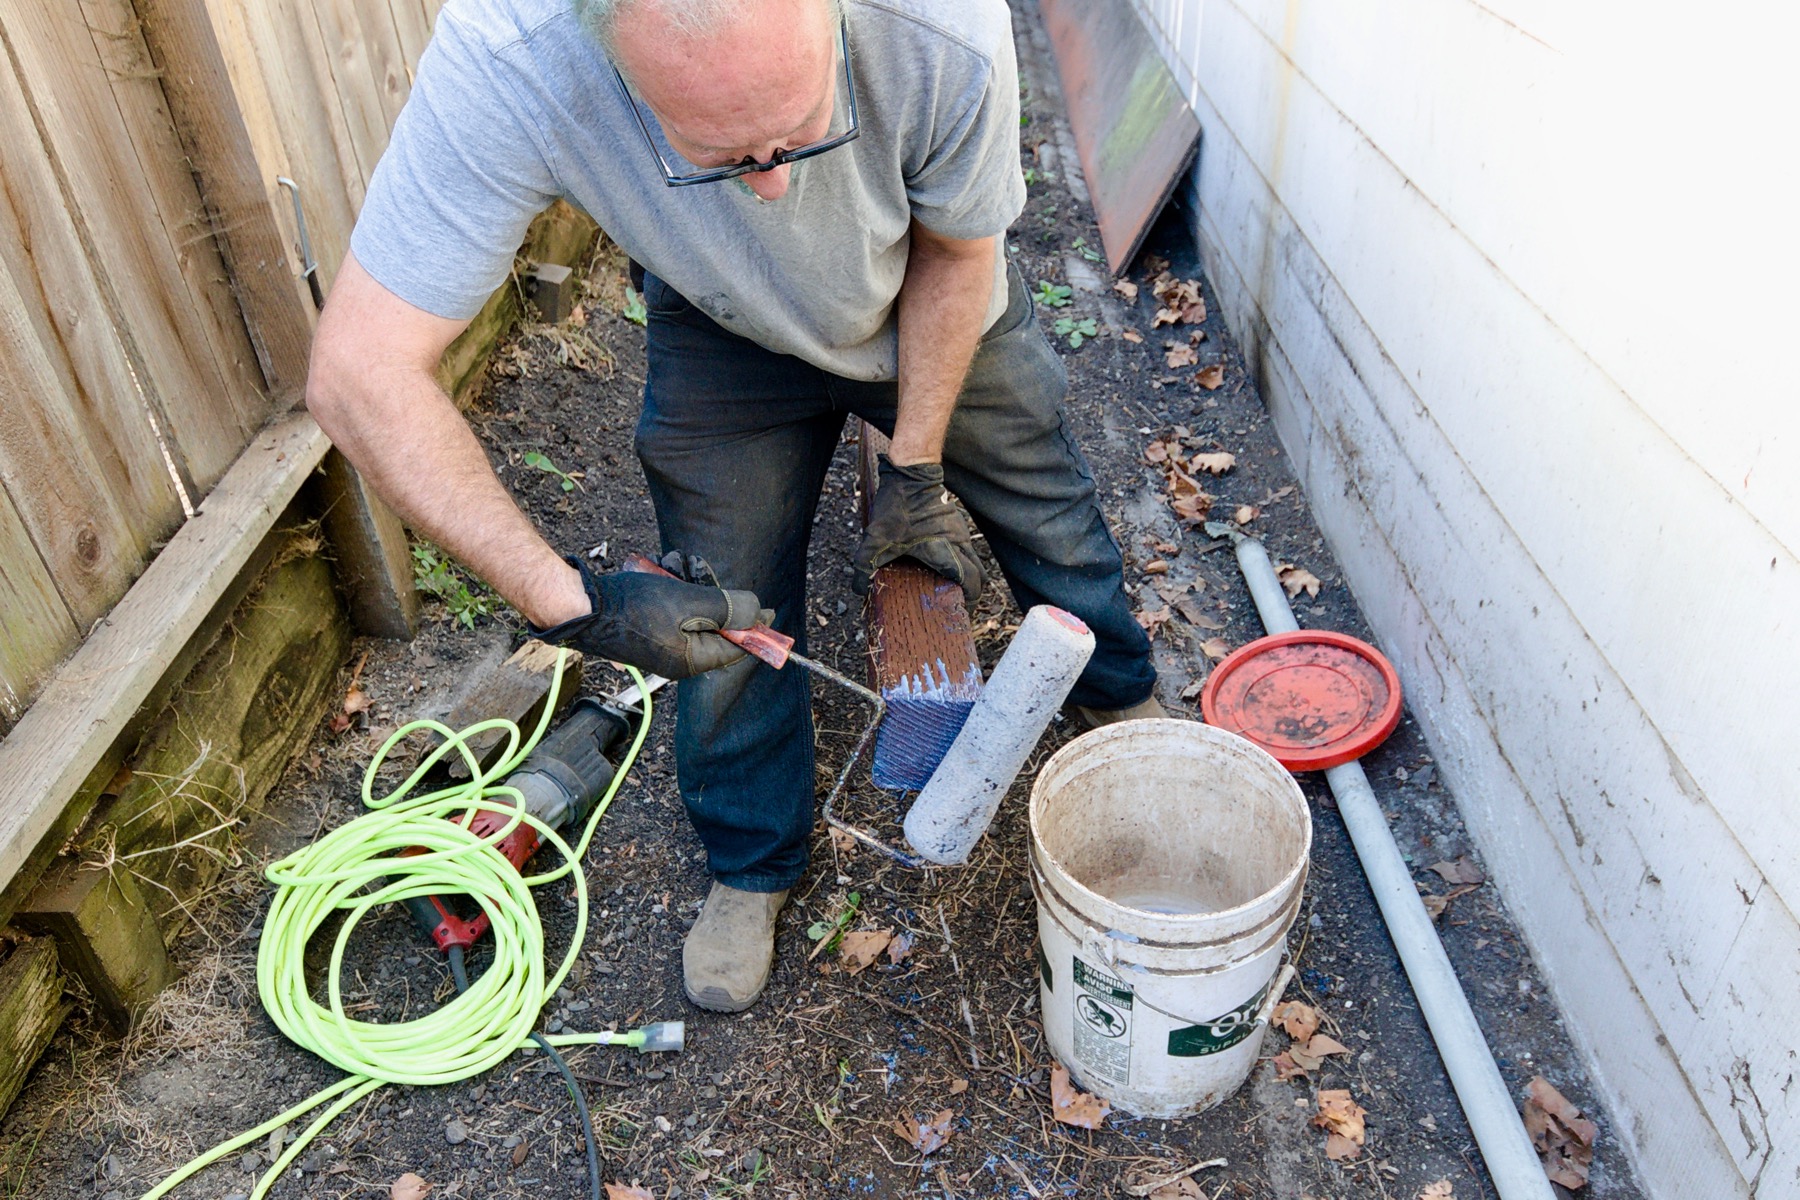
I apply water seal to the bottom 16-20 inches of the post. (Back to top of this section)(Back to top)
Post Size
In this example I was replacing a rotted, pressure treated post with a new pressure treated post. They were the same size and I didn’t need to trim the post to size before driving it in. That isn’t uncommon with pressure treated wood, but I often find I need to change the size of the base of a redwood 4×4. I use a cordless planer to take off a little of the post in the bottom 16-20”. I occasionally take the post to the hole and see if it begins to fit or where it is off. You need to be sure that the post is not too big for the post base or you could crack the base when you drive the post in. And you don’t want it too loose or water will fall into the bottom when it rains and it will rot sooner. You want a snug fit that requires a sledge hammer to drive in.
Of all of the steps in this example, sizing the post is probably the hardest for the DIY user. There are other ways to do this:
- Very carefully measure the hole, then go to various lumber stores and look for 4x4s that are the same size
- Make a mold of the top outline of the hole, for example by pressing floral foam into the top of the post hole to make an impression, then use that to match against 4x4s at various lumber yards
- Rough redwood posts are slightly larger than the smooth S4S redwood posts
- You can also use a hand plane to make a 4×4 thinner
You can also use a smaller post and fill the gap with structural mortar mix (like the use for bricks). Wiggle the post around as your pour the mortar mix in – I like to mix it with a little more water so it flows down into the post base easier. When no more can be put in the post needs to be aligned vertically, before the mortar sets.
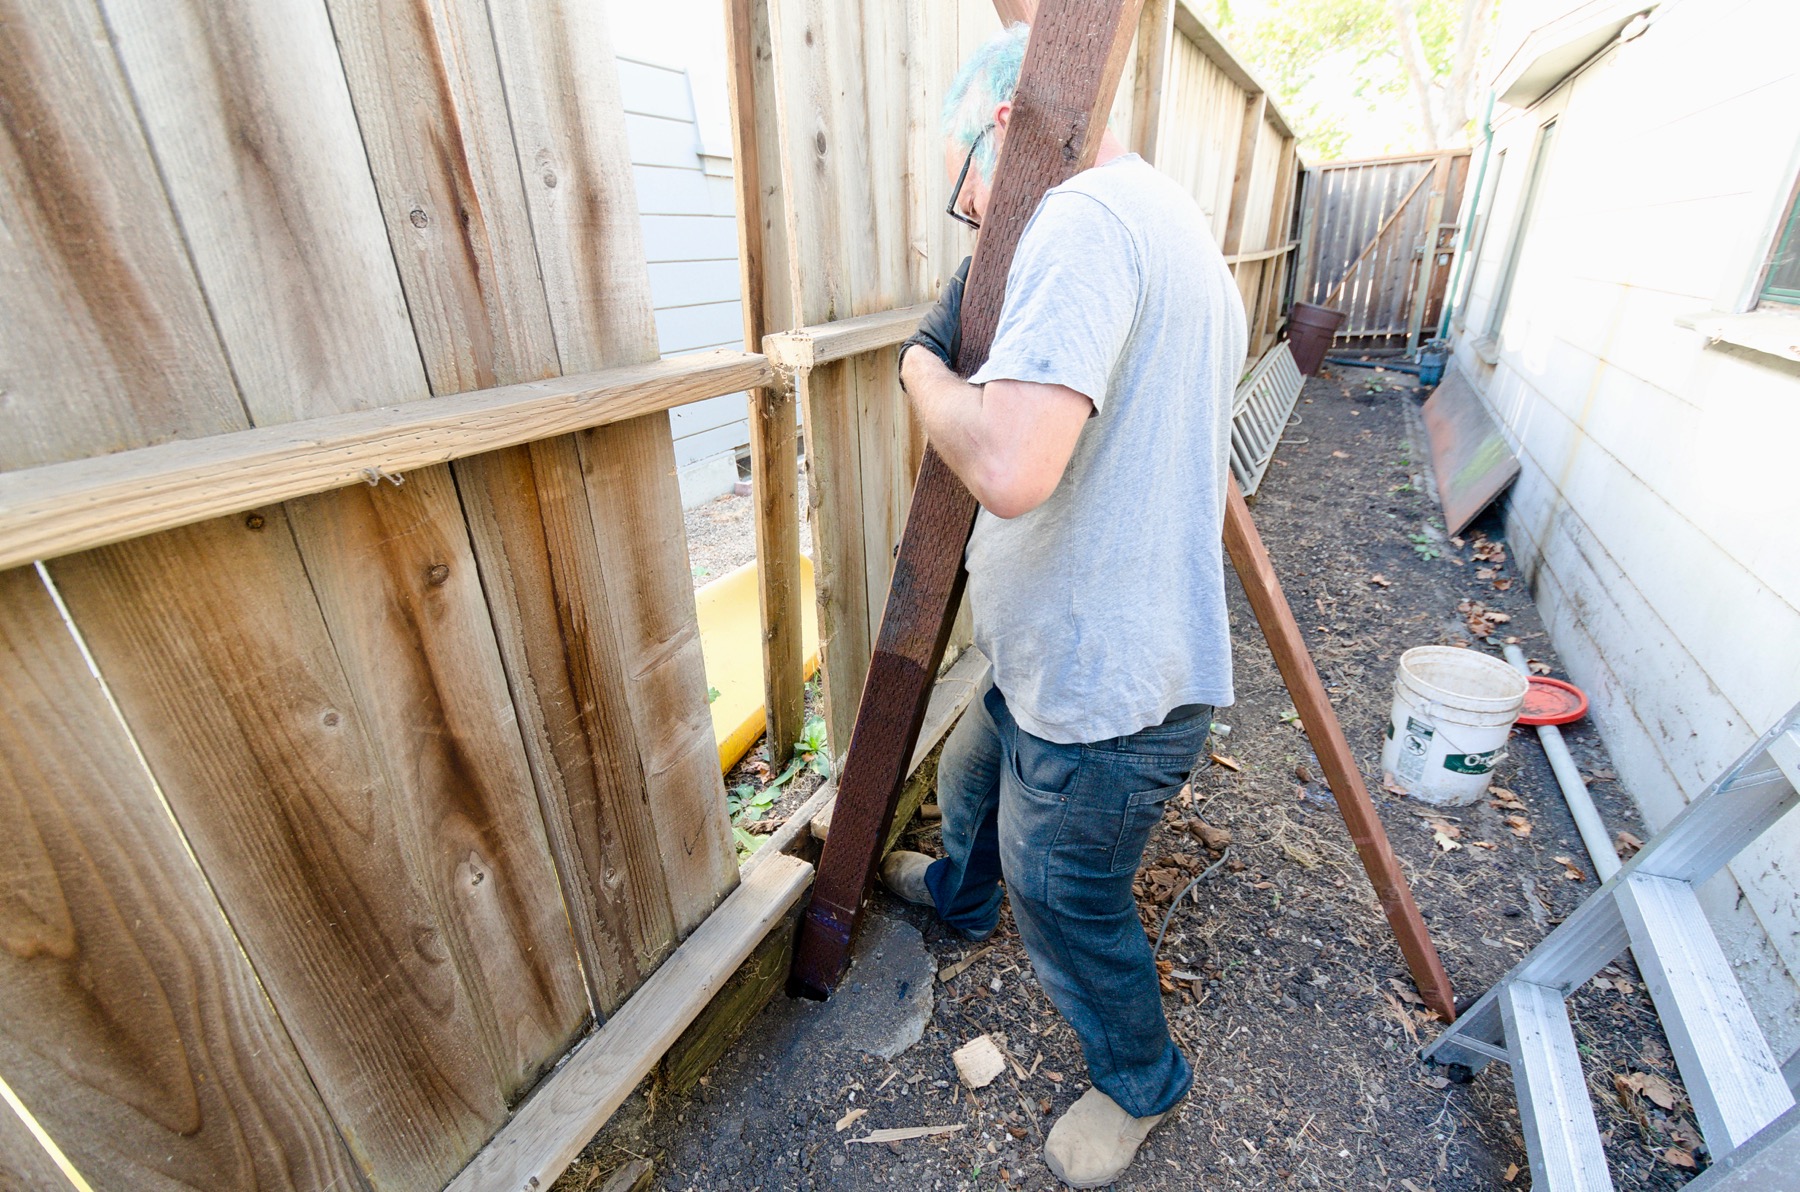
Lean the post into position. (Back to top of this section)(Back to top)
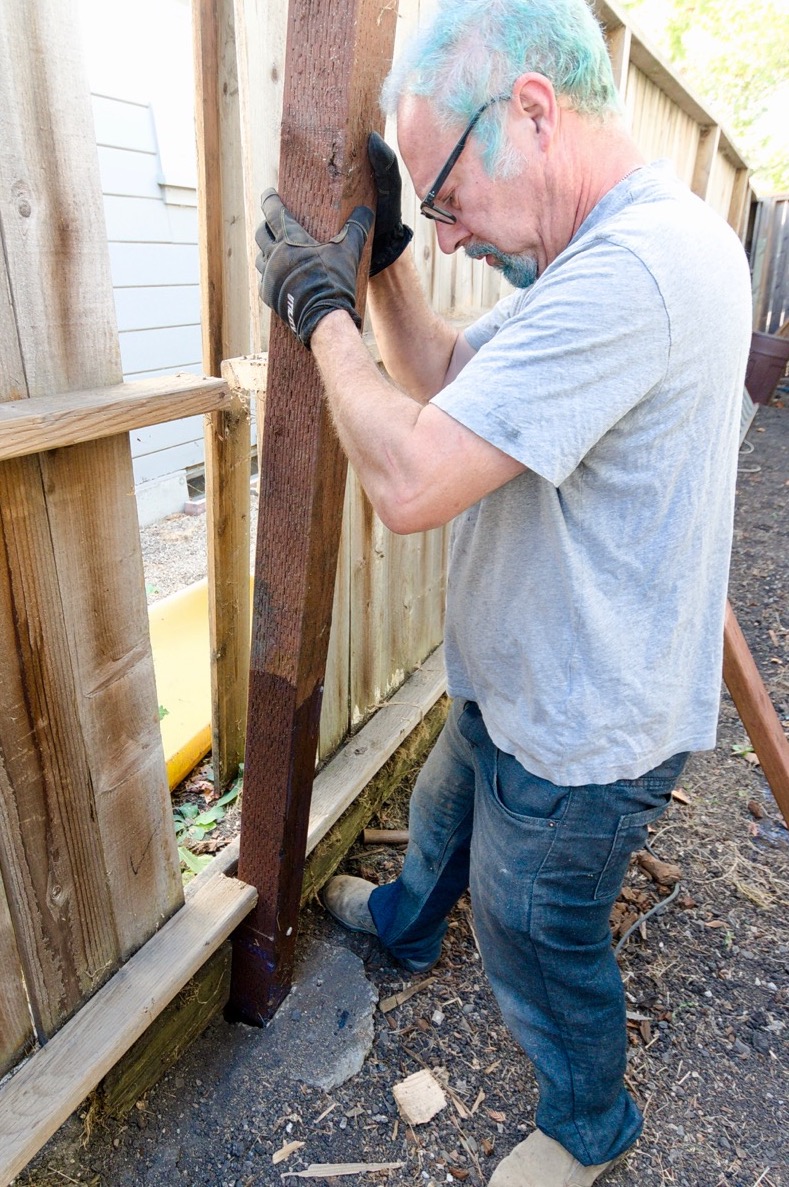
Make sure it fits between the laterals on each end. It bumps against the top 2x4s on this fence. (Back to top of this section)(Back to top)
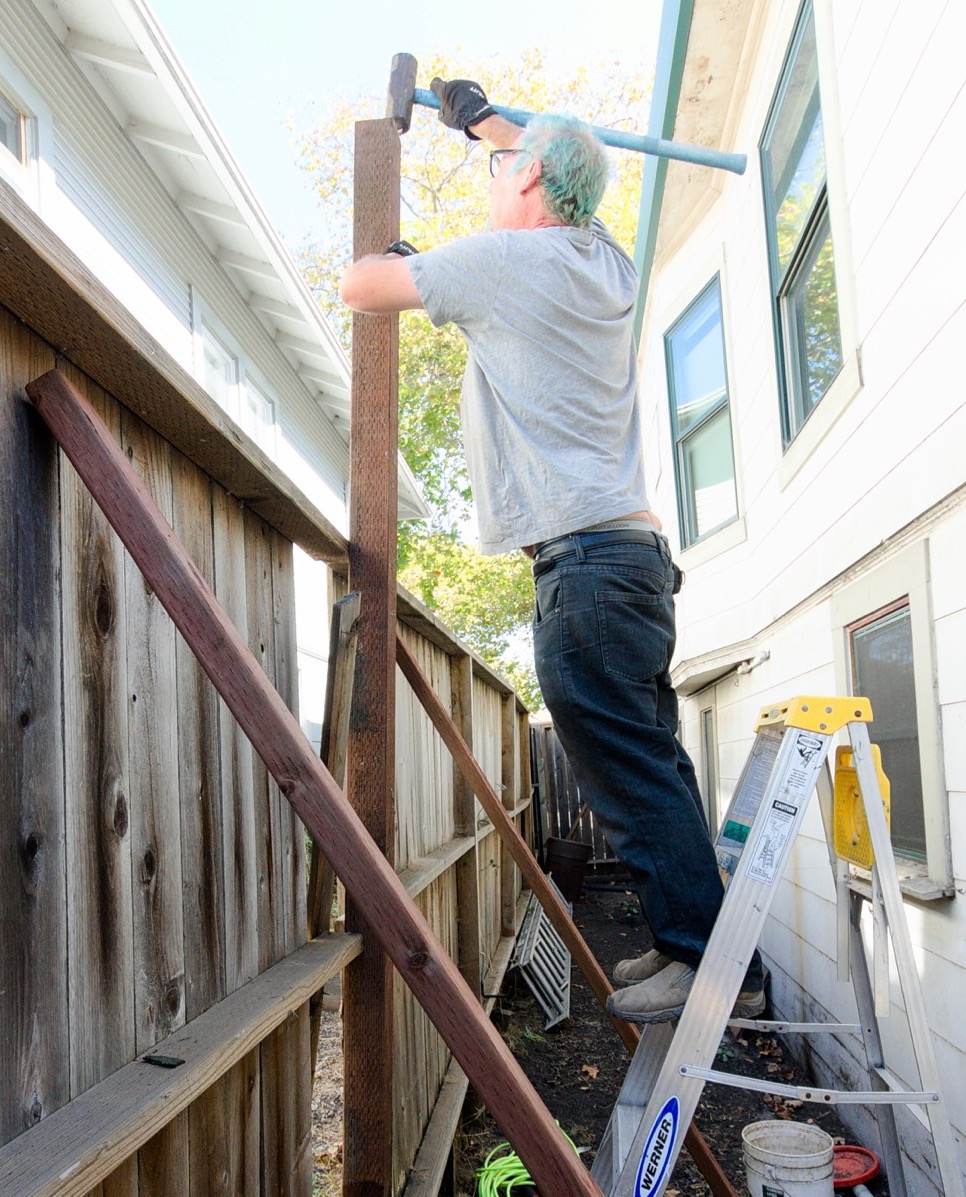
I’m just gently coaxing the post into the hole using this 10lb sledge hammer. I’m using its weight and momentum – I’m not working hard here because it is overhead. I just want to get the post started. (Back to top of this section)(Back to top)
Once it is started it is pretty secure already. I saw off the excess. In this case the post was 10’ tall because the fence had a retaining wall and was taller than 6’. An 8’ post would have been a little too short. I made sure to leave enough post so that after I drive it in it will still be a little too long. When I do hit the top with a sledge it will damage the wood there, so I want to cut that away when I cut it to its final length.(Back to top of this section)(Back to top)
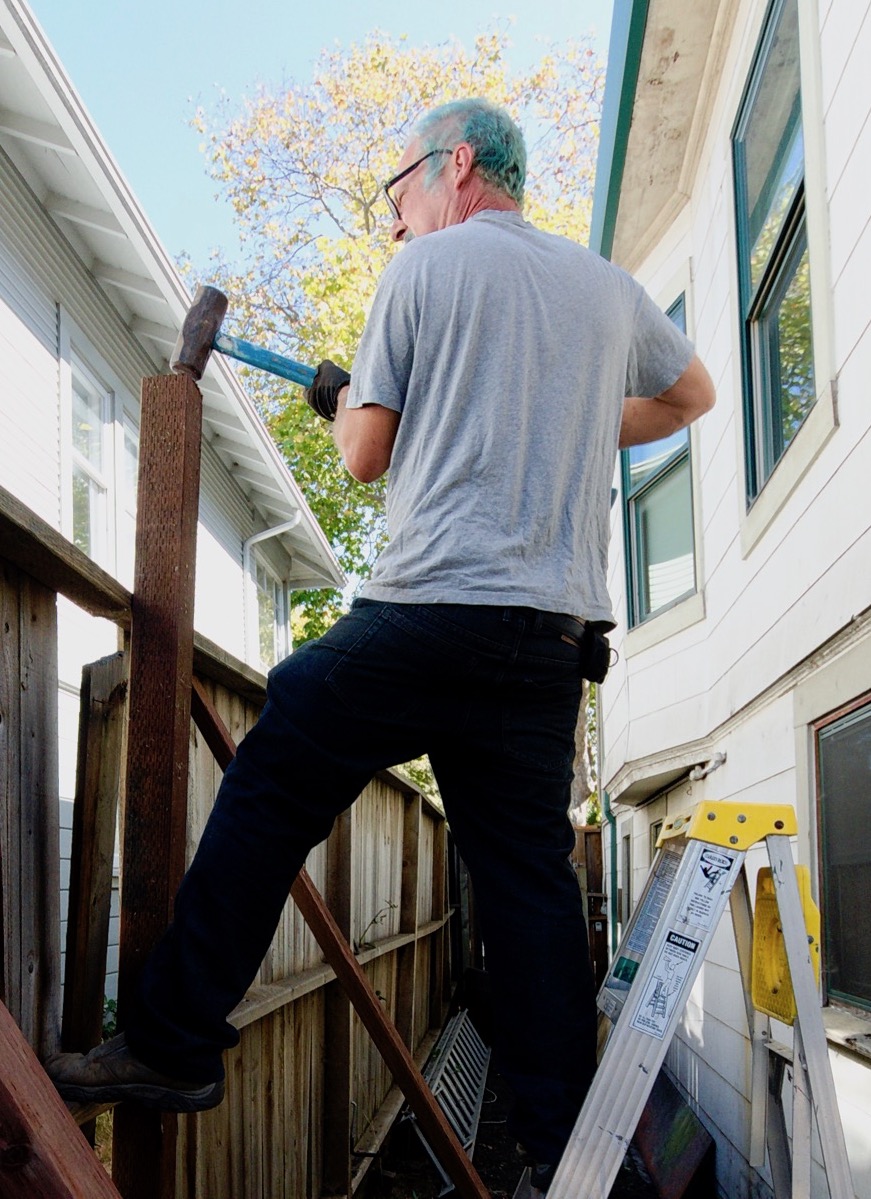
I braced myself and then used a sledge hammer carefully to drive the post into the post base until the ground shook when I hit it and it would go no further. If you keep hammering too long, or if it was too thick you might not be able to drive it all the way in as far as you dug. (Back to top of this section)(Back to top)
I braced myself and then used a sawzall to cut the new post to fit just under the two 2×4 laterals at the top of the fence. I sprayed the cut end with wood preservative, otherwise the cut end will rot.(Back to top of this section)(Back to top)
I slid the 2x4s onto the top of the 4×4 and secured them with new 3.5” T25 Torx head screws. Now the post is in the right place and is already supporting the fence. The 2×4 braces can now be removed because the fence cannot fall. (Back to top of this section)(Back to top)
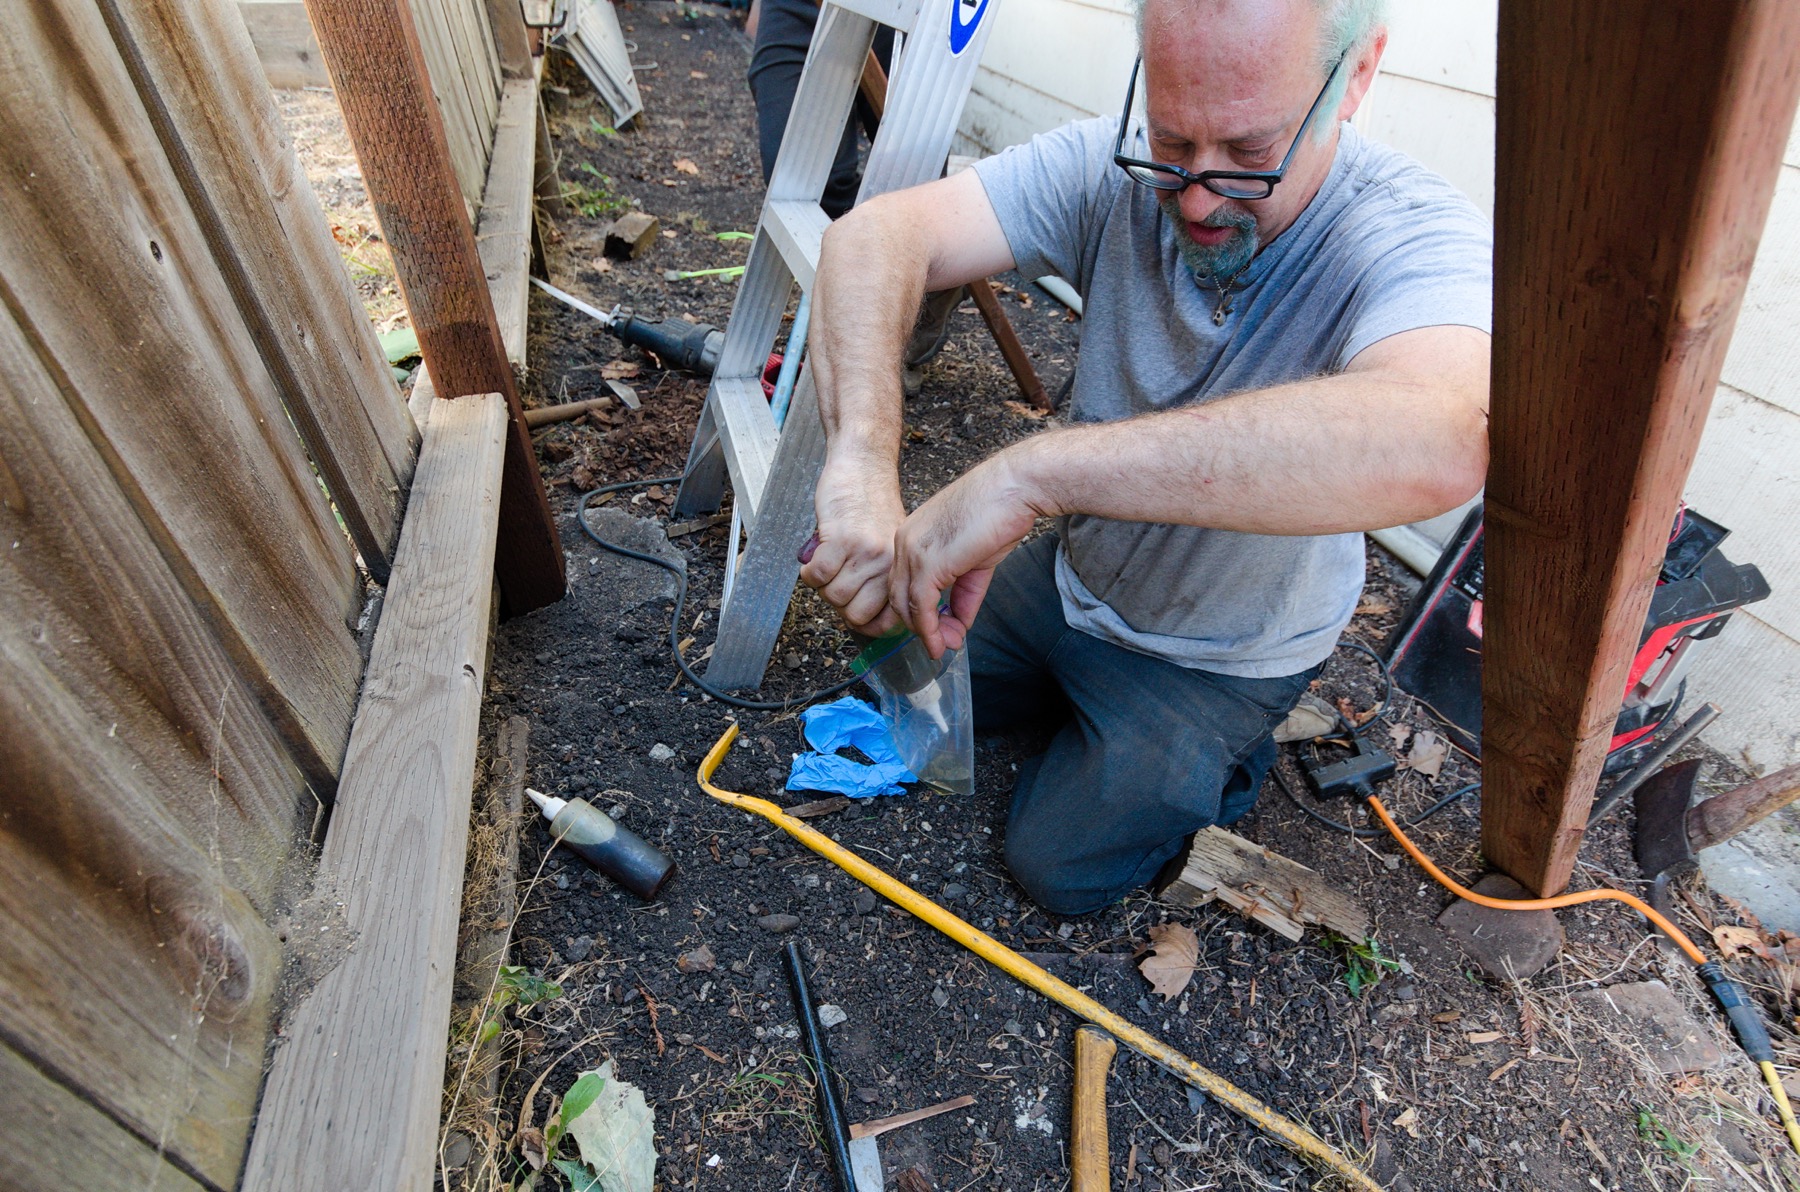
I use the Sika Fence Post Mix as a gap-filling sealant. I have plastic bottles of the two different parts. I squirt equal amounts into the two bottom corners of a plastic bag and then mix them together in the bag. (Back to top of this section)(Back to top)
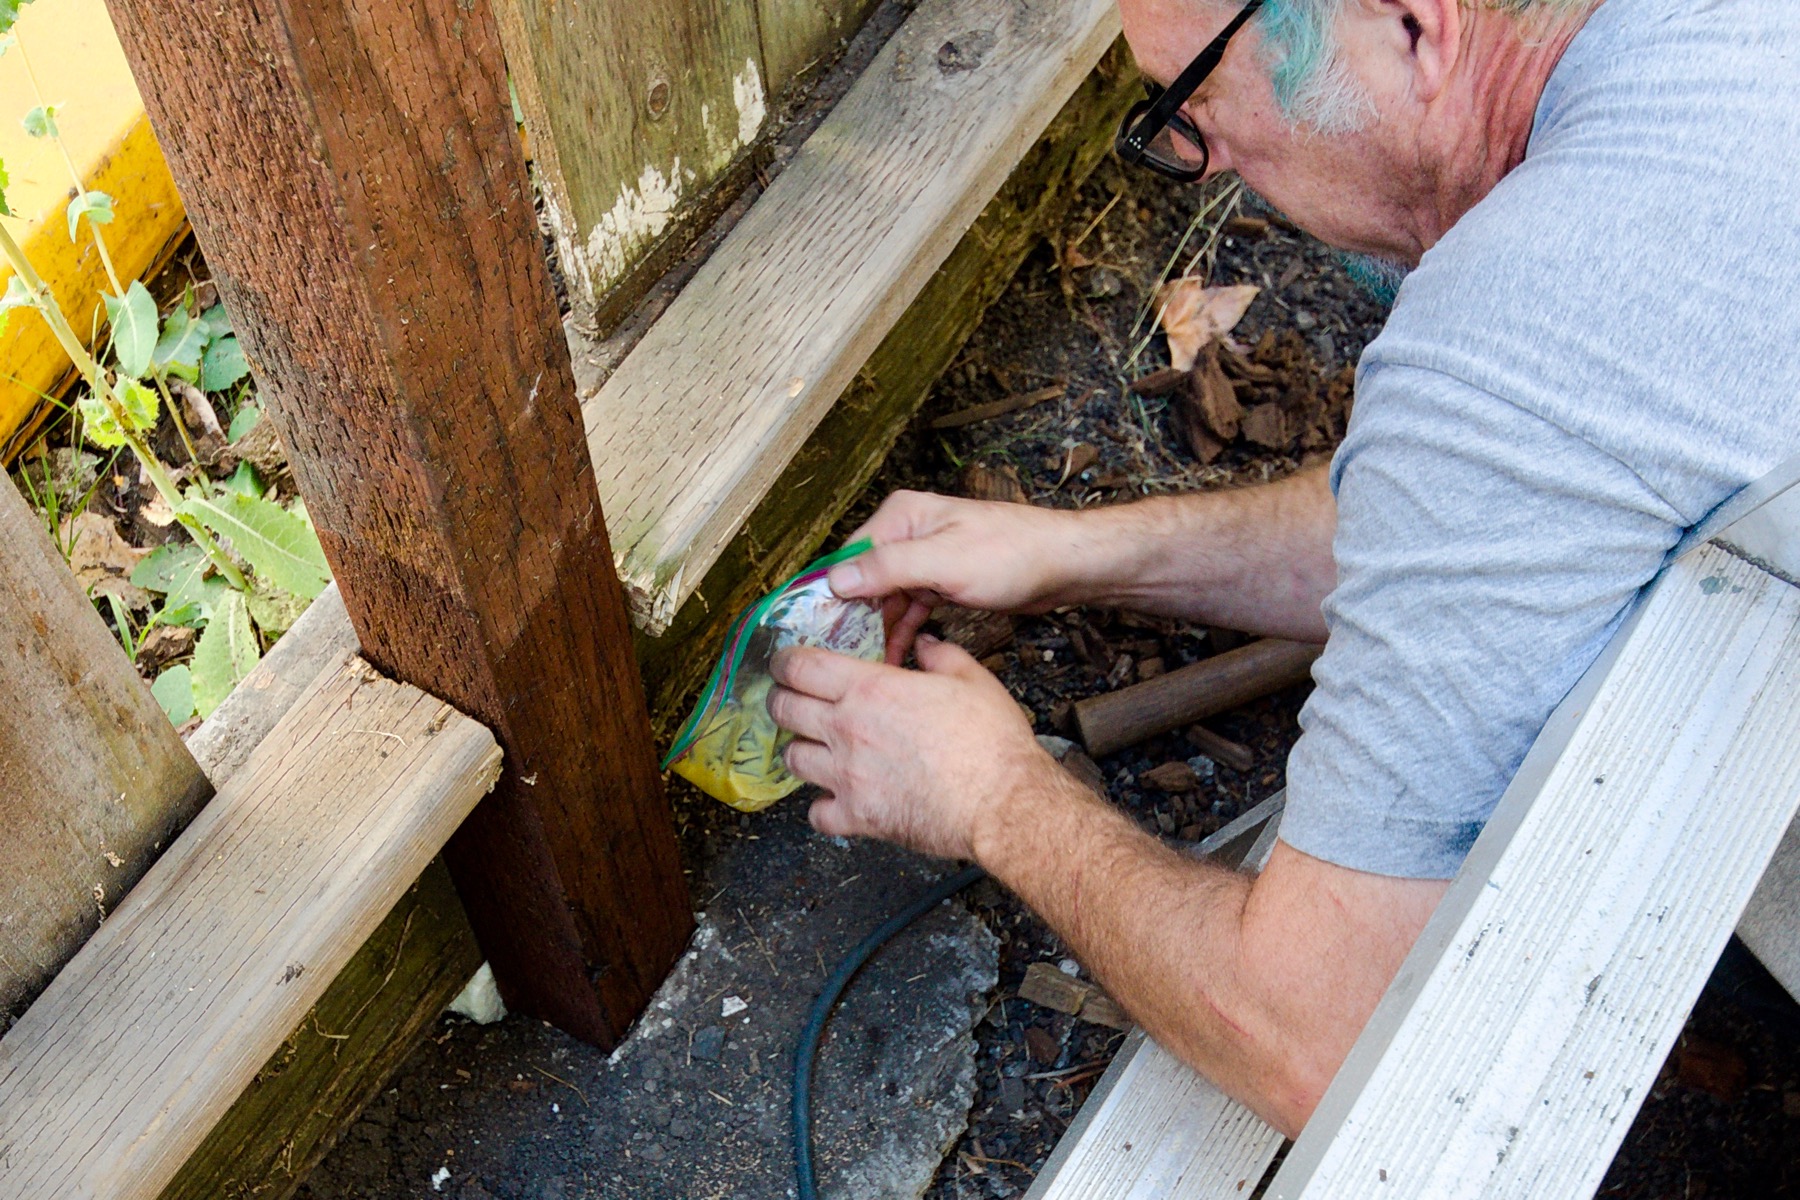
I cut off a small corner and squirt the mixed polyurethane glue out into the gap around the post to fill it up. (Back to top of this section)(Back to top)
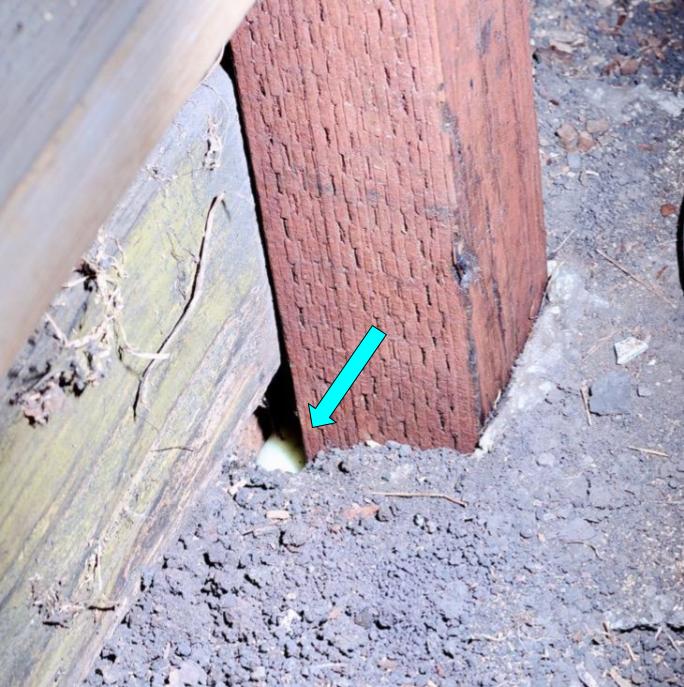
The green arrow points to the expanding green polyurethane foam. (Back to top of this section)(Back to top)
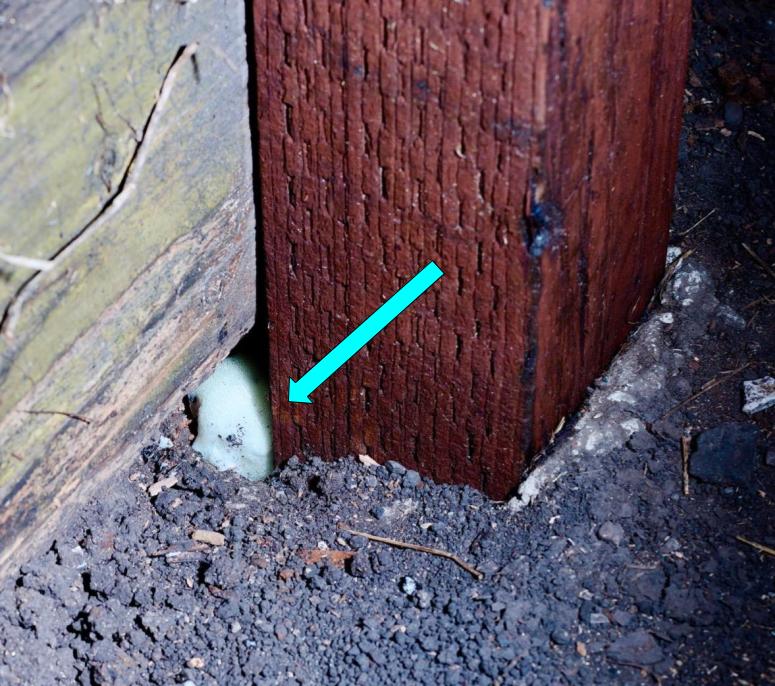
The green arrow points to the expanded green polyurethane foam. (Back to top of this section)(Back to top)
Attach the fence to the new post
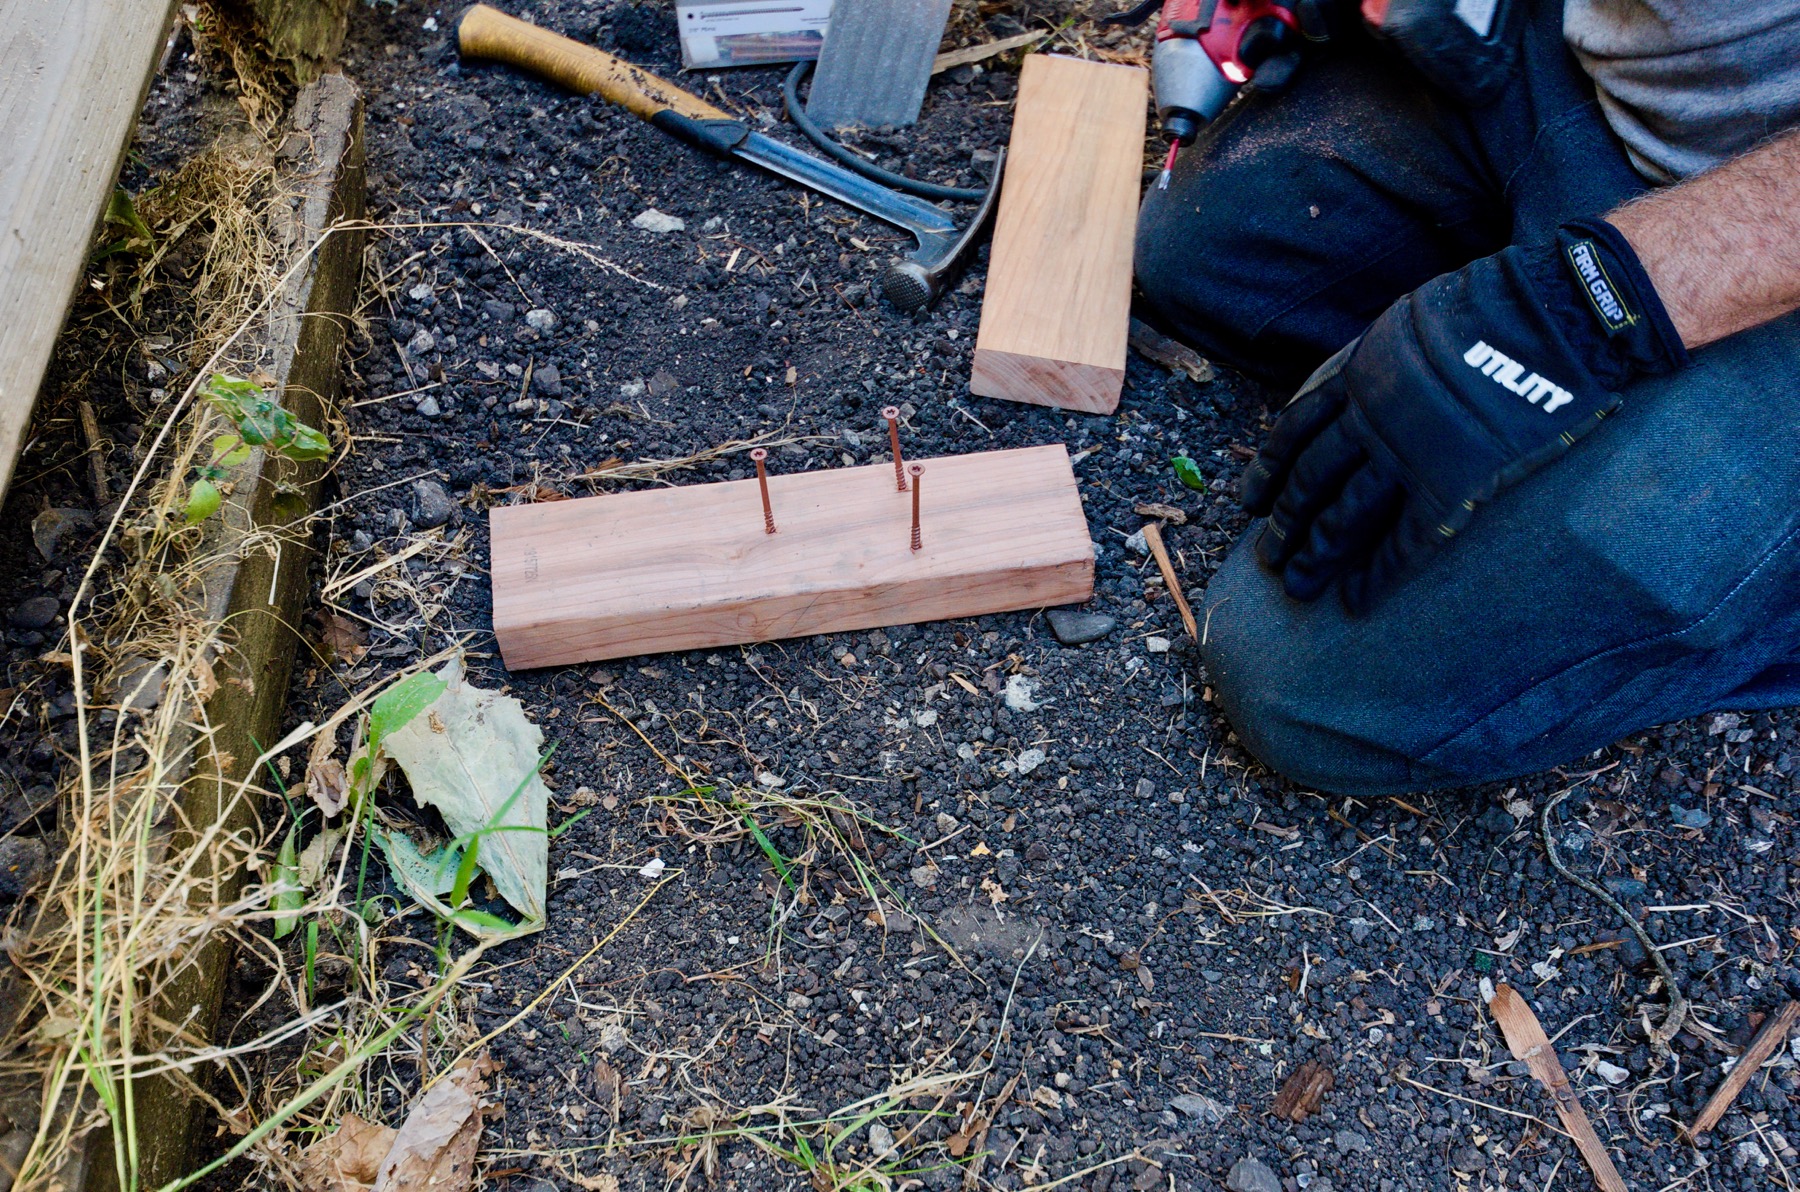
Start by cutting a couple pieces of wood about a foot long. I used redwood. If you use pressure treated wood be sure to spray the cut ends with wood preservative, otherwise the cut ends will rot. (Back to top of this section)(Back to top)
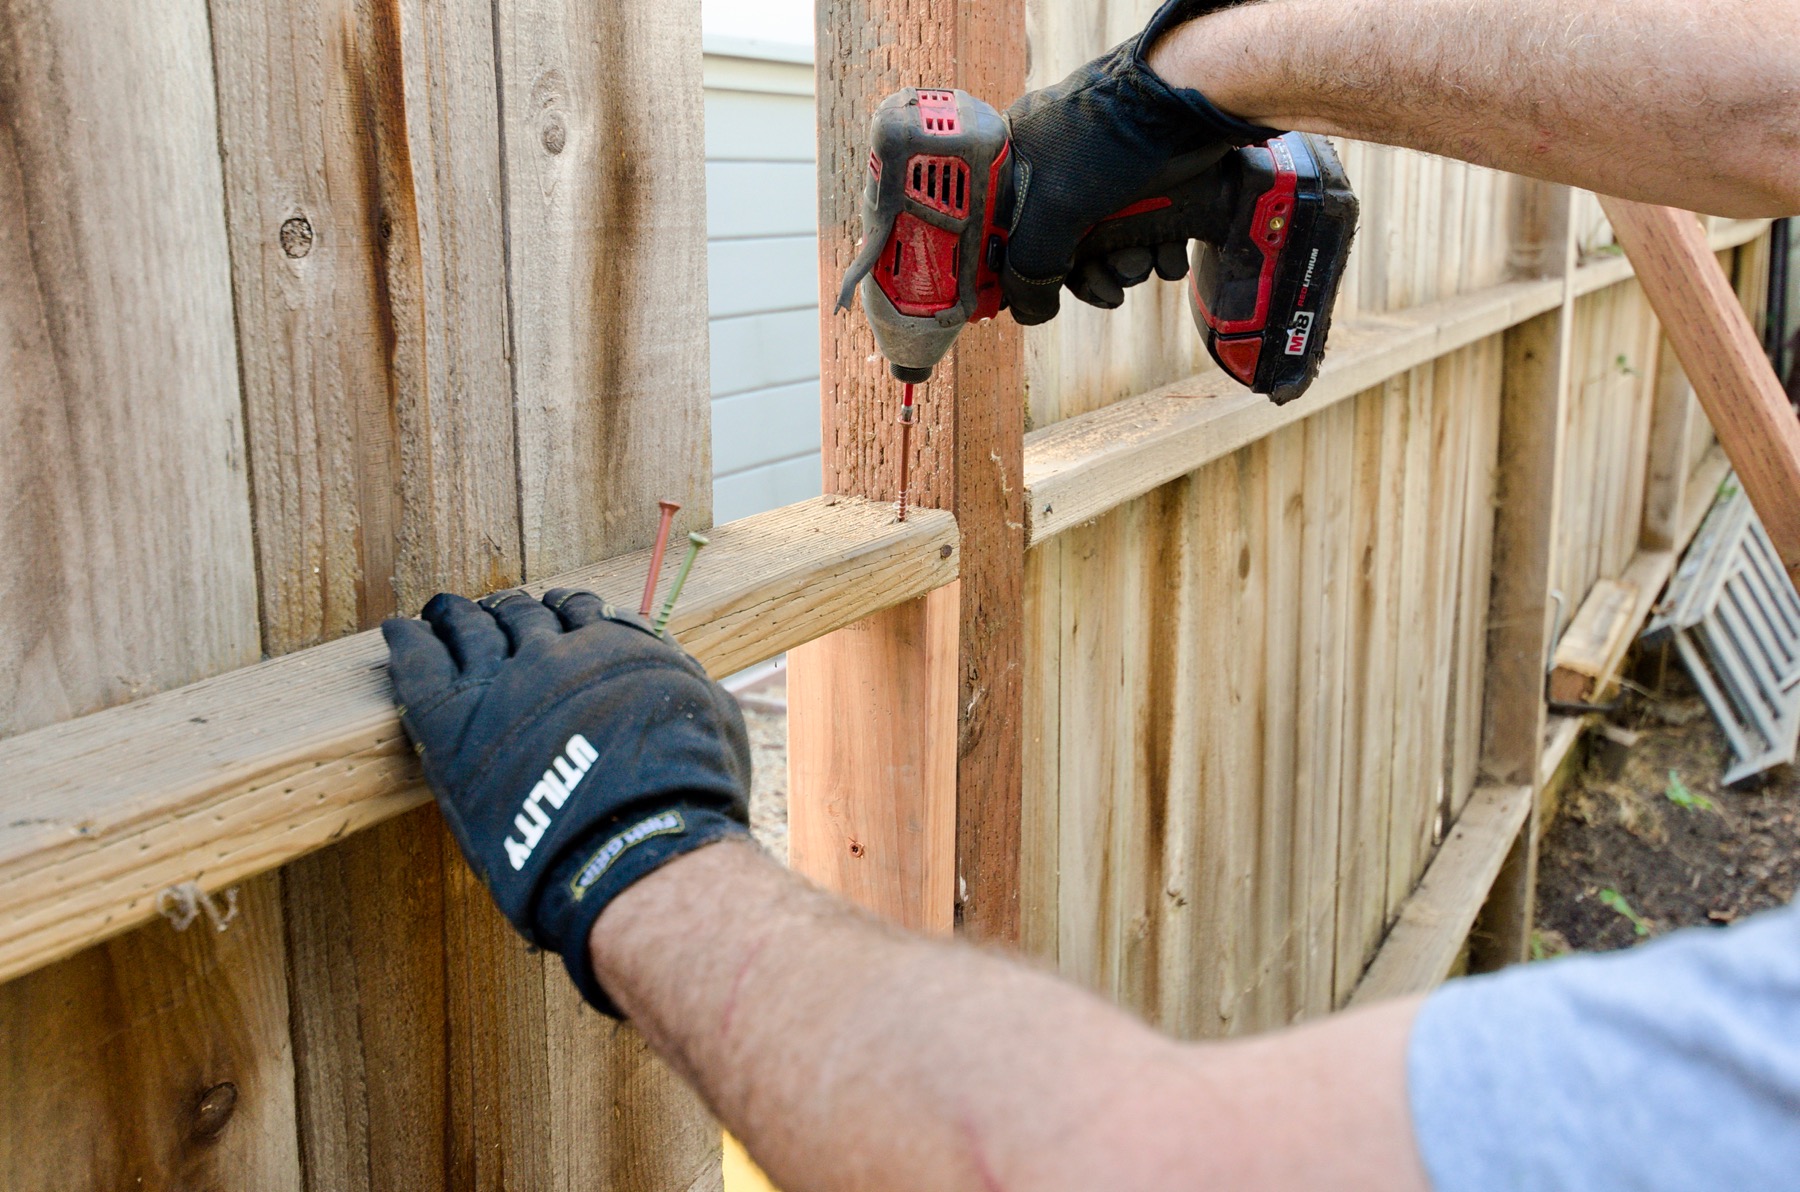
The gusset fits against the post and supports a 2×4 lateral. I use three screws in the gusset and three screws to hold the 2×4 to the gusset and post. Again, I use 3.5” T25 Torx head screws. I attach one gusset on each side of the post to support each 2×4 lateral that doesn’t rest on the post itself. (Back to top of this section)(Back to top)
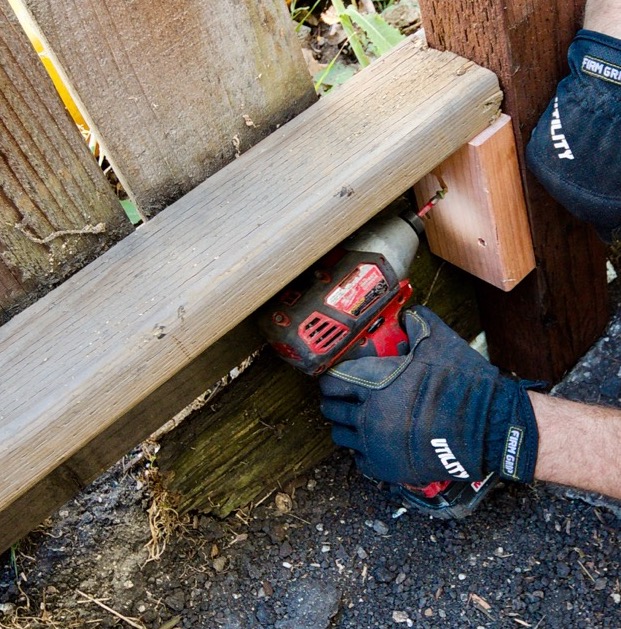
I made a shorter gusset to fit under the bottom lateral. The gusset fits against the post and supports a 2×4 lateral. I use three screws in the gusset and three screws to hold the 2×4 to the gusset and post. Again, I use 3.5” T25 Torx head screws. (Back to top of this section)(Back to top)
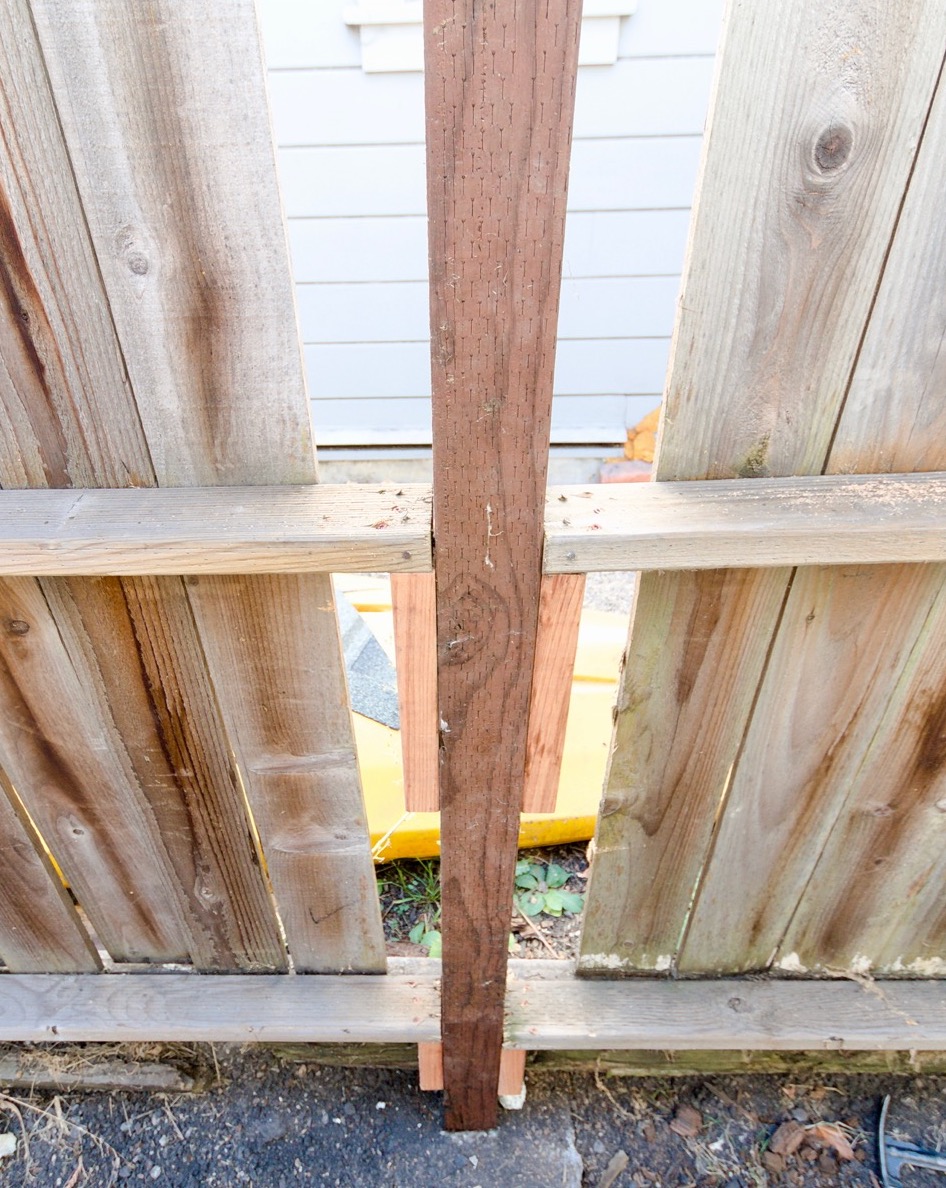
I attach one gusset on each side of the post to support each 2×4 lateral that doesn’t rest on the post itself. Now the post is secured to the structure of the fence. All that remains is to reattach the pickets on the other side. (Back to top of this section)(Back to top)
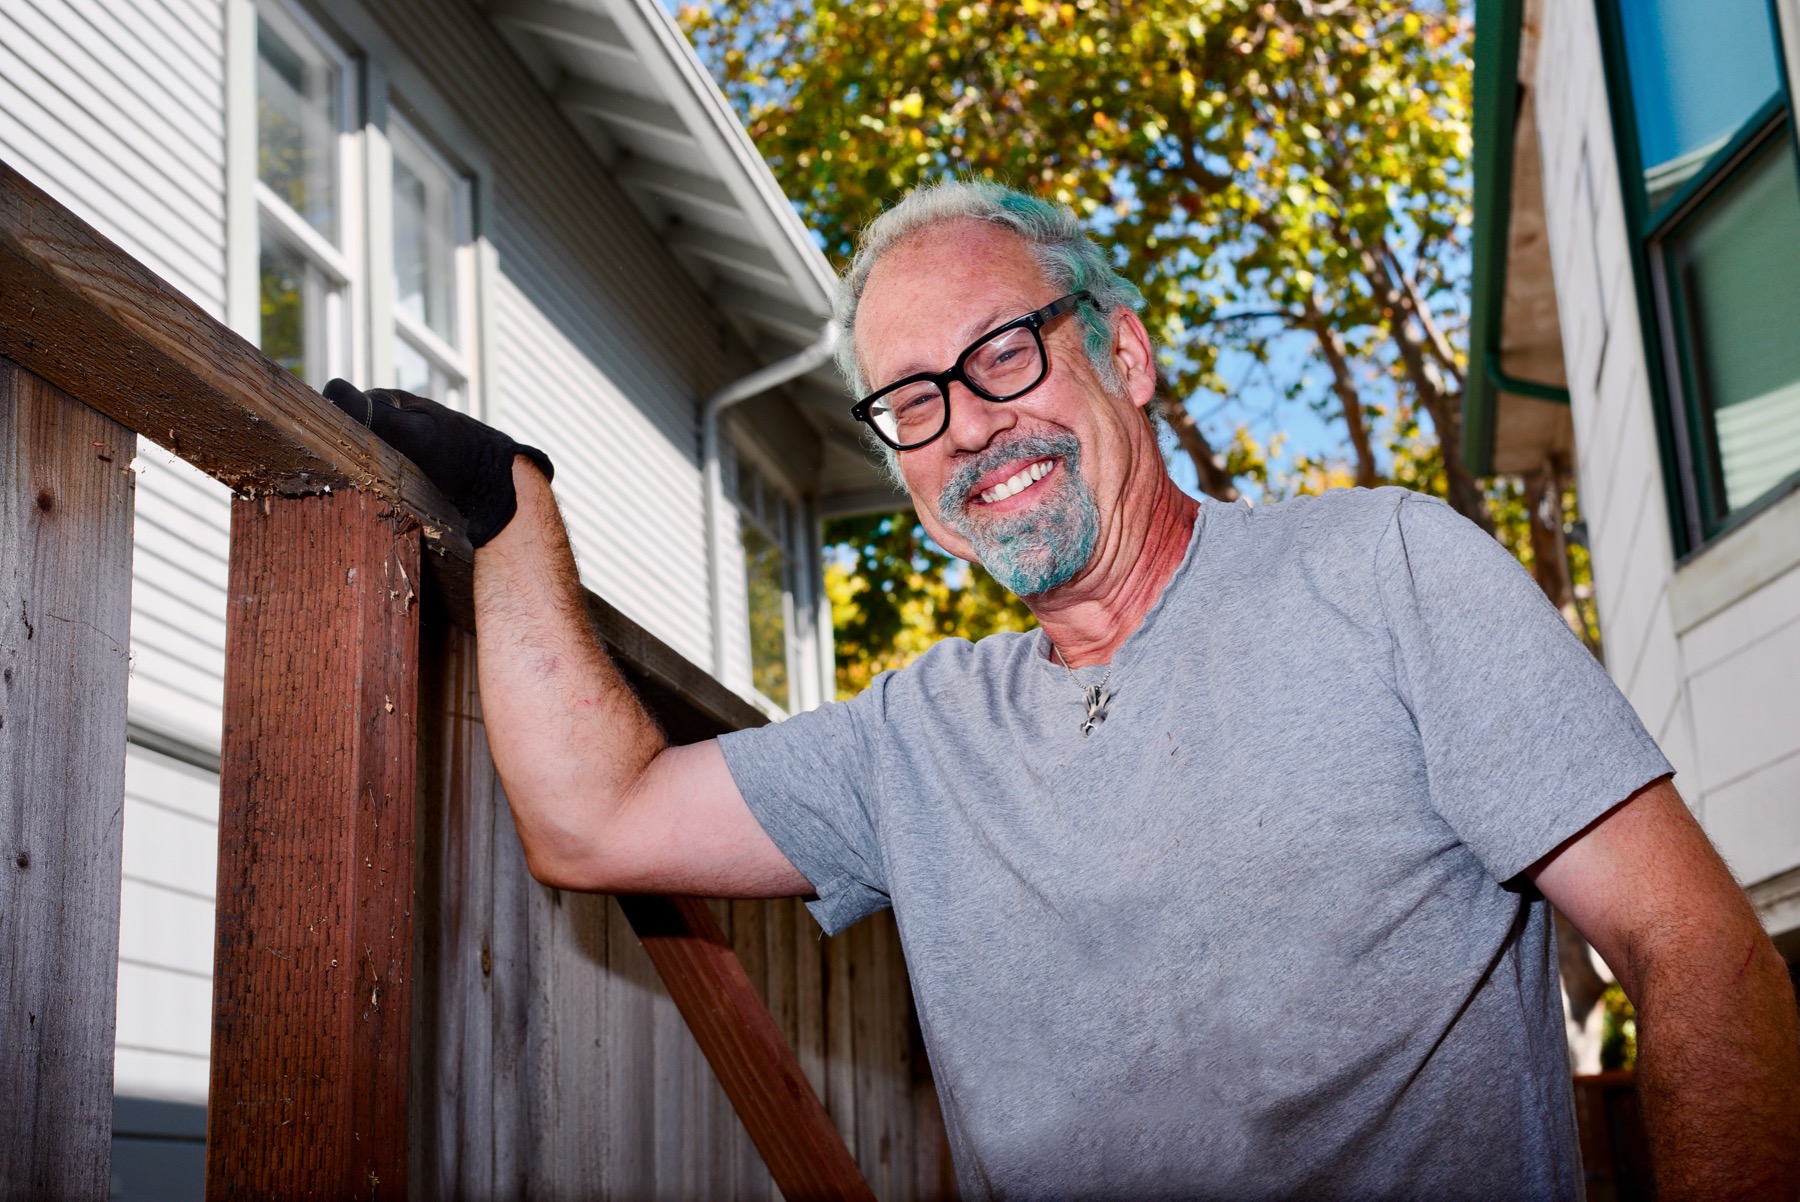
The job is done. The post has been replaced by reusing the existing concrete post base. (Back to top of this section)(Back to top)
Leave a Reply
You must be logged in to post a comment.