<--Previous  Up

domedeck1

1V Shade Structure
Above you can see the completed 1V shade structure that fits over the dome deck. Here are instructions for how to make it.
  1. You'll obviously need to make the struts for the 1v dome before you can assemble them. How big should these struts be? You actually have a lot more flexibility than you might think because of the way that a 1v dome works. The "Wall Struts" (the ones that connect the dome deck to the roof of the 1v shade structure) must all be the same length, but, you can pick your own length (technically so as long as they are more than half the length of the dome deck pentagon struts -- the long struts in your dome). Really, you might want to use some fairly long wall struts, because it raises the roof.

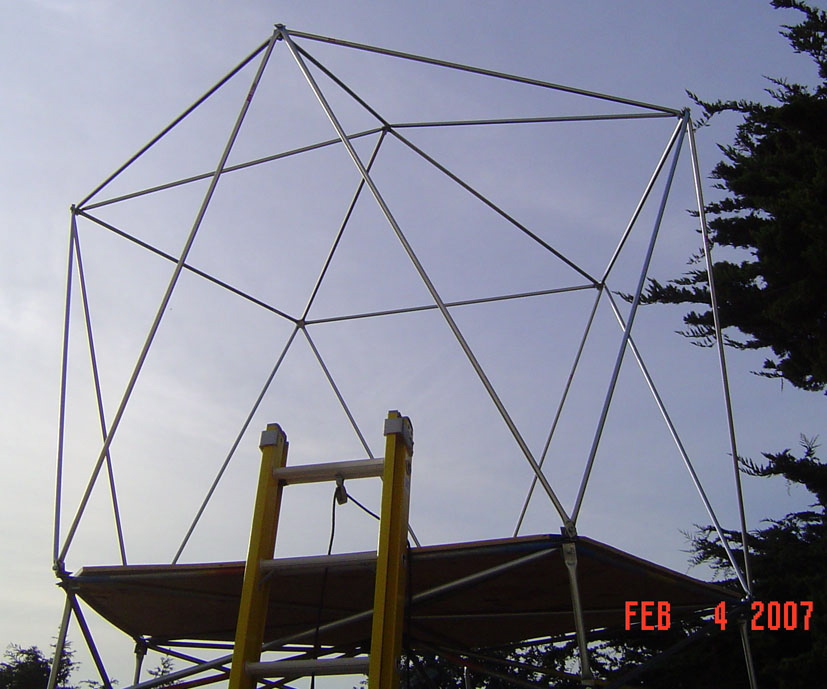
    The 1v roof pentagon struts could also be longer or shorter, depending on your preference, but, it probably doesn't make sense for them to be shorter than the dome deck pentagon struts. If they were shorter, the shade structure would have a smaller roof than the base, and the walls would lean inwards. If they are larger than the dome deck pentagon struts then the roof will be bigger than the deck, which might not be too bad. Then the roof will cast a bigger shadow and be a better shade cover. But, of course, the walls would lean outward. It might mislead someone into thinking the wooden deck is larger than it really is and they might step off the deck! I made my top pentagon the same size as the dome deck pentagon struts so that the walls are vertical.

    The 1v roof radial struts need to be long enough so that the roof is higher than the roof pentagon. It needs to be enough higher so that the structure is rigid. For example, the center of the roof should be at least 1 foot higher than the roof pentagon struts. In a regular 1v, the center of the roof is higher than perhaps you want for the shade structure. A high roof is more likely to catch the wind.

    In the end, I just took the conduit left over after cutting the roof pentagon struts and flattened the ends and called those the radial roof struts. That made for a lower roof than I would have had if the radial roof struts were the same length as the roof pentagon struts, and it had the advantage of eliminating all waste for those struts.

  2. You should already have attached angle brackets to the top of the risers. If not, attach them now. The 1v wall struts will attach to these angle brackets.
  3. Bend the ends of all the struts that are part of the 1v shade dome. The ends should be bent to about 20 degrees or so.
  4. Attach two wall struts together with a 2" carriage bolt and add a nut to keep them from coming apart. Do the same four more times so you have five pairs.
  5. Attach the free end of one strut from one pair to one of the angle brackets at the top of a riser using a 1" carriage bolt. Add a nut to keep it from coming loose.
  6. Attach the free end of the other strut to the angle bracket on an adjacent riser. Before adding a nut, add a free end from another paired of wall struts. Then add the nut. Repeat this step for each pair of wall struts until all the wall struts are attached to the dome deck.
  7. Attach a dome roof pentagon strut between the top of each pair of wall struts. Repeat until the doom roof pentagon is complete.
  8. Attach a radial roof strut to a dome roof vertex.
  9. Attach a another radial roof strut to a dome roof vertex and attach it to the other radial roof strut(s) you have already just attached. Repeat until all the radial dome struts are attached. Violla! The 1v shade dome is done!

All information herein copyright 2007 by Howard Cohen
hoco@timefold.com