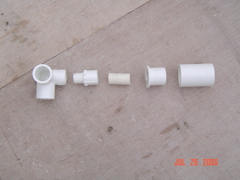
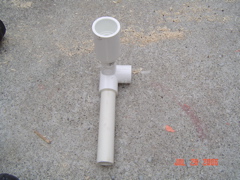
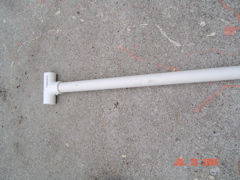
This is how the PVC parts fit together to form a corner. The corner will attach 2 3/4" PVC pipes to a vertical 1" PVC pipe. This part is easy to make -- you can't misalign anything. But, you could fail to insert the pieces as far as they can be. Glue one piece on at a time and twist and push them together as far as they can go. You'll make six corners like this. |
|
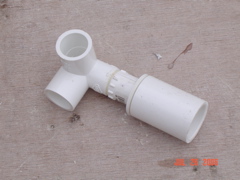
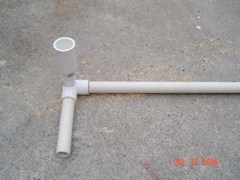
Here's the finished assembly. You have to attach the parts while the glue is wet. You have about 3 seconds before it dries permanantly! So, make one joint at a time. |
|
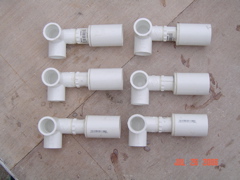
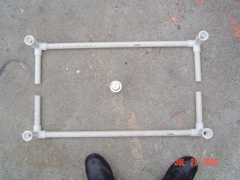
Here are the six corner joints that are required. |
|
|
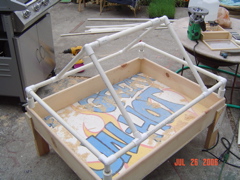
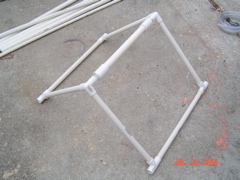
After making the corners, dry fit all the gantry parts together before even thinking of beginning the gluing process. Gluing must be done carefully, in the right order, or you will have an unusable mess before you get very far. |
First, make two corners using two 6" stubs. Just make sure they completely seat. There is no aligmment to mess up here. |
|
Then you'll add the long side to one corner. You really can't mess this part up either because the tubes are round and nothing can get misaligned. |
|
Now is your first opportunity to really mess up. You will need to add the other corner and be certain that the two stubs are parallel to each other. I used the ground. I dry fit the pieces to get an idea of how they fit together. I used the ground to make sure that the ends of the stubs both touch the ground at the same time when the short side is also flat on the ground. Then, I applied glue and then, all in one motion I forced-the-corner-onto-the-end-of-the-short-side and-put-it-on-the-ground-and-forced-the-two-stubs-onto-the-ground. The glue dried solid in the length of time it took you to read that sentence. If you wait more than 2 seconds to adjust the pieces, you'll be going back to the hardware store to buy more PVC fittings. You'll make two sides of the gantry. |
|
Next you'll be making the middle portion of the gantry -- it fits betwen the two sides. This part is *easy* to screw up permanently by getting things misaligned. So, do this as described in the steps that follow. |
|
Start with making the riser connected to a tee-- it can't be made wrong because there is nothing to align. You'll make two like this for each side of the gantry (for a total of 4 side risers). Just make sure they seat completely. |
|
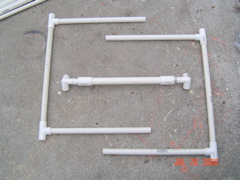
Now you're going to make the three pieces in this photo. A left and right riser and the shower rod. You'll make these three pieces and then connect them together. Start by connecting the middle section of the long side to one of the tees. You can't do this wrong because there is no alignment to worry about. Then you need to connect another riser side's tee to the middle portion, and this you can screw up if they aren't aligned. Just like with the gantry sides, use the ground to ensure that the ends of the riser sides are parallel. It is easier because they are longer. But, you still only have about 2 seconds to get them aligned before the glue dries. Dry fit them first and then pull them apart and glue-them-and-put-them-down-and-align-them. Make two riser sides. Now you need to make the shower bar. You can glue one corner onto the shower bar without risk. But the other corner needs to be aligned with the first corner. Again, I used the ground. I held the shower bar down and made sure both edges of the other two slip fittings were in contact with the ground. This was difficult because they are so short! But, I practiced without glue until I was sure I could do it in 2 seconds flat. Then I applied-glue-and-put-it-down-and-made-sure-the-ends-were-perfectly-aligned-within-2-seconds. |
main | Page 1 | Page 2 | Page 3 | Page 4 | Page 5 | Page 6 | Page 7 | Page 8