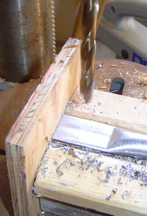
The right side to drill This side has no "dent" as was visible on the last photo on the previous page. This side is completely flat and minimizes the chance that the drill bit will wander. |
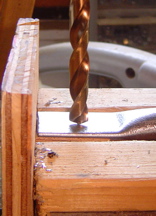
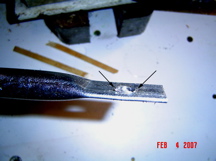
Ready to Drill This view shows the drill bit in contact with the flat portion of the strut. When you cut your struts, you included extra length for the tabs. For 3/4" conduit, I leave 1" from the end of the flat portion to the center of the hole, so that means I cut each strut 2" longer than the length that the calculatordome calculator indicates is needed. The conduit dome tips page suggests that only 3/4" is needed. I think it is a matter of taste, and either is really fine. Just be sure to take into account the exact amount of distance from the center of the hole on each end to the end of the conduit in your calculations. And, of course, make sure your conduit drilling jig is adjusted so that when you insert a strut and push it against the plywood end of the jig, the drill bit is the same distance from the end of the strut as you assumed when you cut the struts. In other words, don't measure and cut your struts as if the holes will be in one place and then drill them in a different place. |
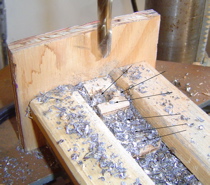
Debris after drilling Here you can see that after drilling some conduit there is lots of fine metal pieces everywhere. These are extremely sharp. You can get a metal sliver and it these can be extremely painful. Also, all those bits of metal will prevent your strut from sitting correctly in the jig, and make keep it from making contact with the plywood back, which will cause you to drill in the wrong place! |

Removing Drilling Debris Use a small metal brush (or a toothbrush, or you fingers in a leather glove) to remove the metal shavings. DON'T USE YOUR BARE FINGERS |
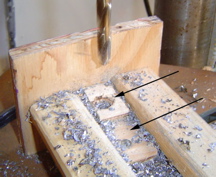
Debris has been cleared These have been clear enough. The slight debris in the corners doesn't matter as long as it doesn't interfere with the strut laying flat. Notice that the top shim is being drilled along with the strut. The shim is going to get destroyed after a while -- you may need to replace it. |
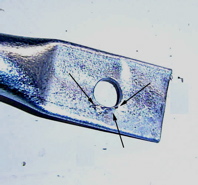
Drill Flash After you drill the hole in the strut, there will be some flash around the edge of the hole. This excess metal is left behind by the drill. It is very sharp -- you can't just flick it off with your fingers. Click the picture for a more detailed view. Sometimes I use a countersink bit in a hand drill to clear it away, but you can clear it away with the grinding wheel. |
Another view of the Drill Flash Click the image for a better view. |
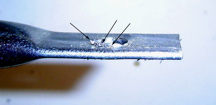
Yet another view of the Drill Flash Click the image for a better view. |